
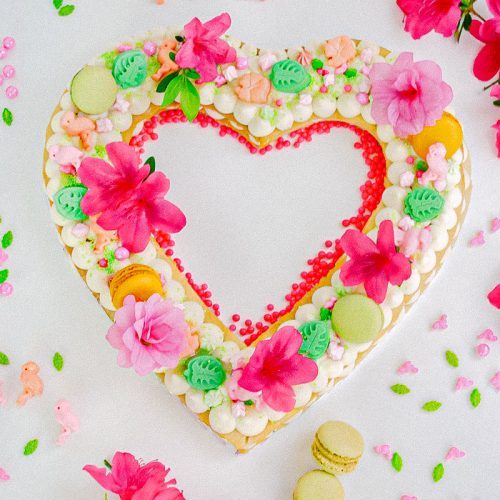
A heart cream tart is the perfect way to express your creativity and make any occasion extra special with stunning visual appeal. Not only does it taste delicious, but it also lets you customize decorations that reflect personal style, making it a delightful centerpiece for celebrations or gatherings.
Introduction to Cookie Cream Tarts
Large, stacked cookies with sweet cream dots between the layers and on top have gained popularity as the new “cookie cake.” In recent years, social media has showcased cookie cream tarts, which are more elaborately decorated than traditional large cookies used as cakes. Initially made with cookie layers, these tarts can also use cake layers, decorated with cream and unique details.
Cookie cream tarts are often shaped like numbers. They are sometimes called “number” cakes for birthdays or anniversaries. However, they can be made into other shapes, such as hearts, for Valentine’s Day celebrations or just because.
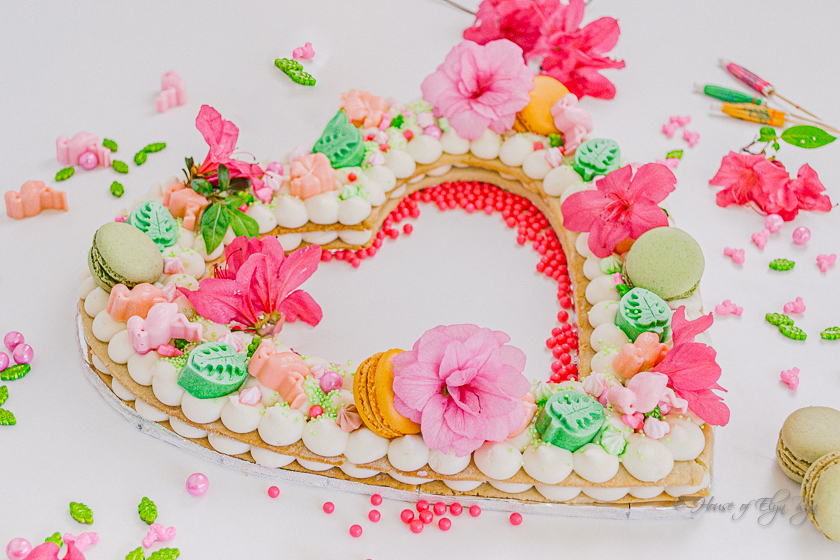
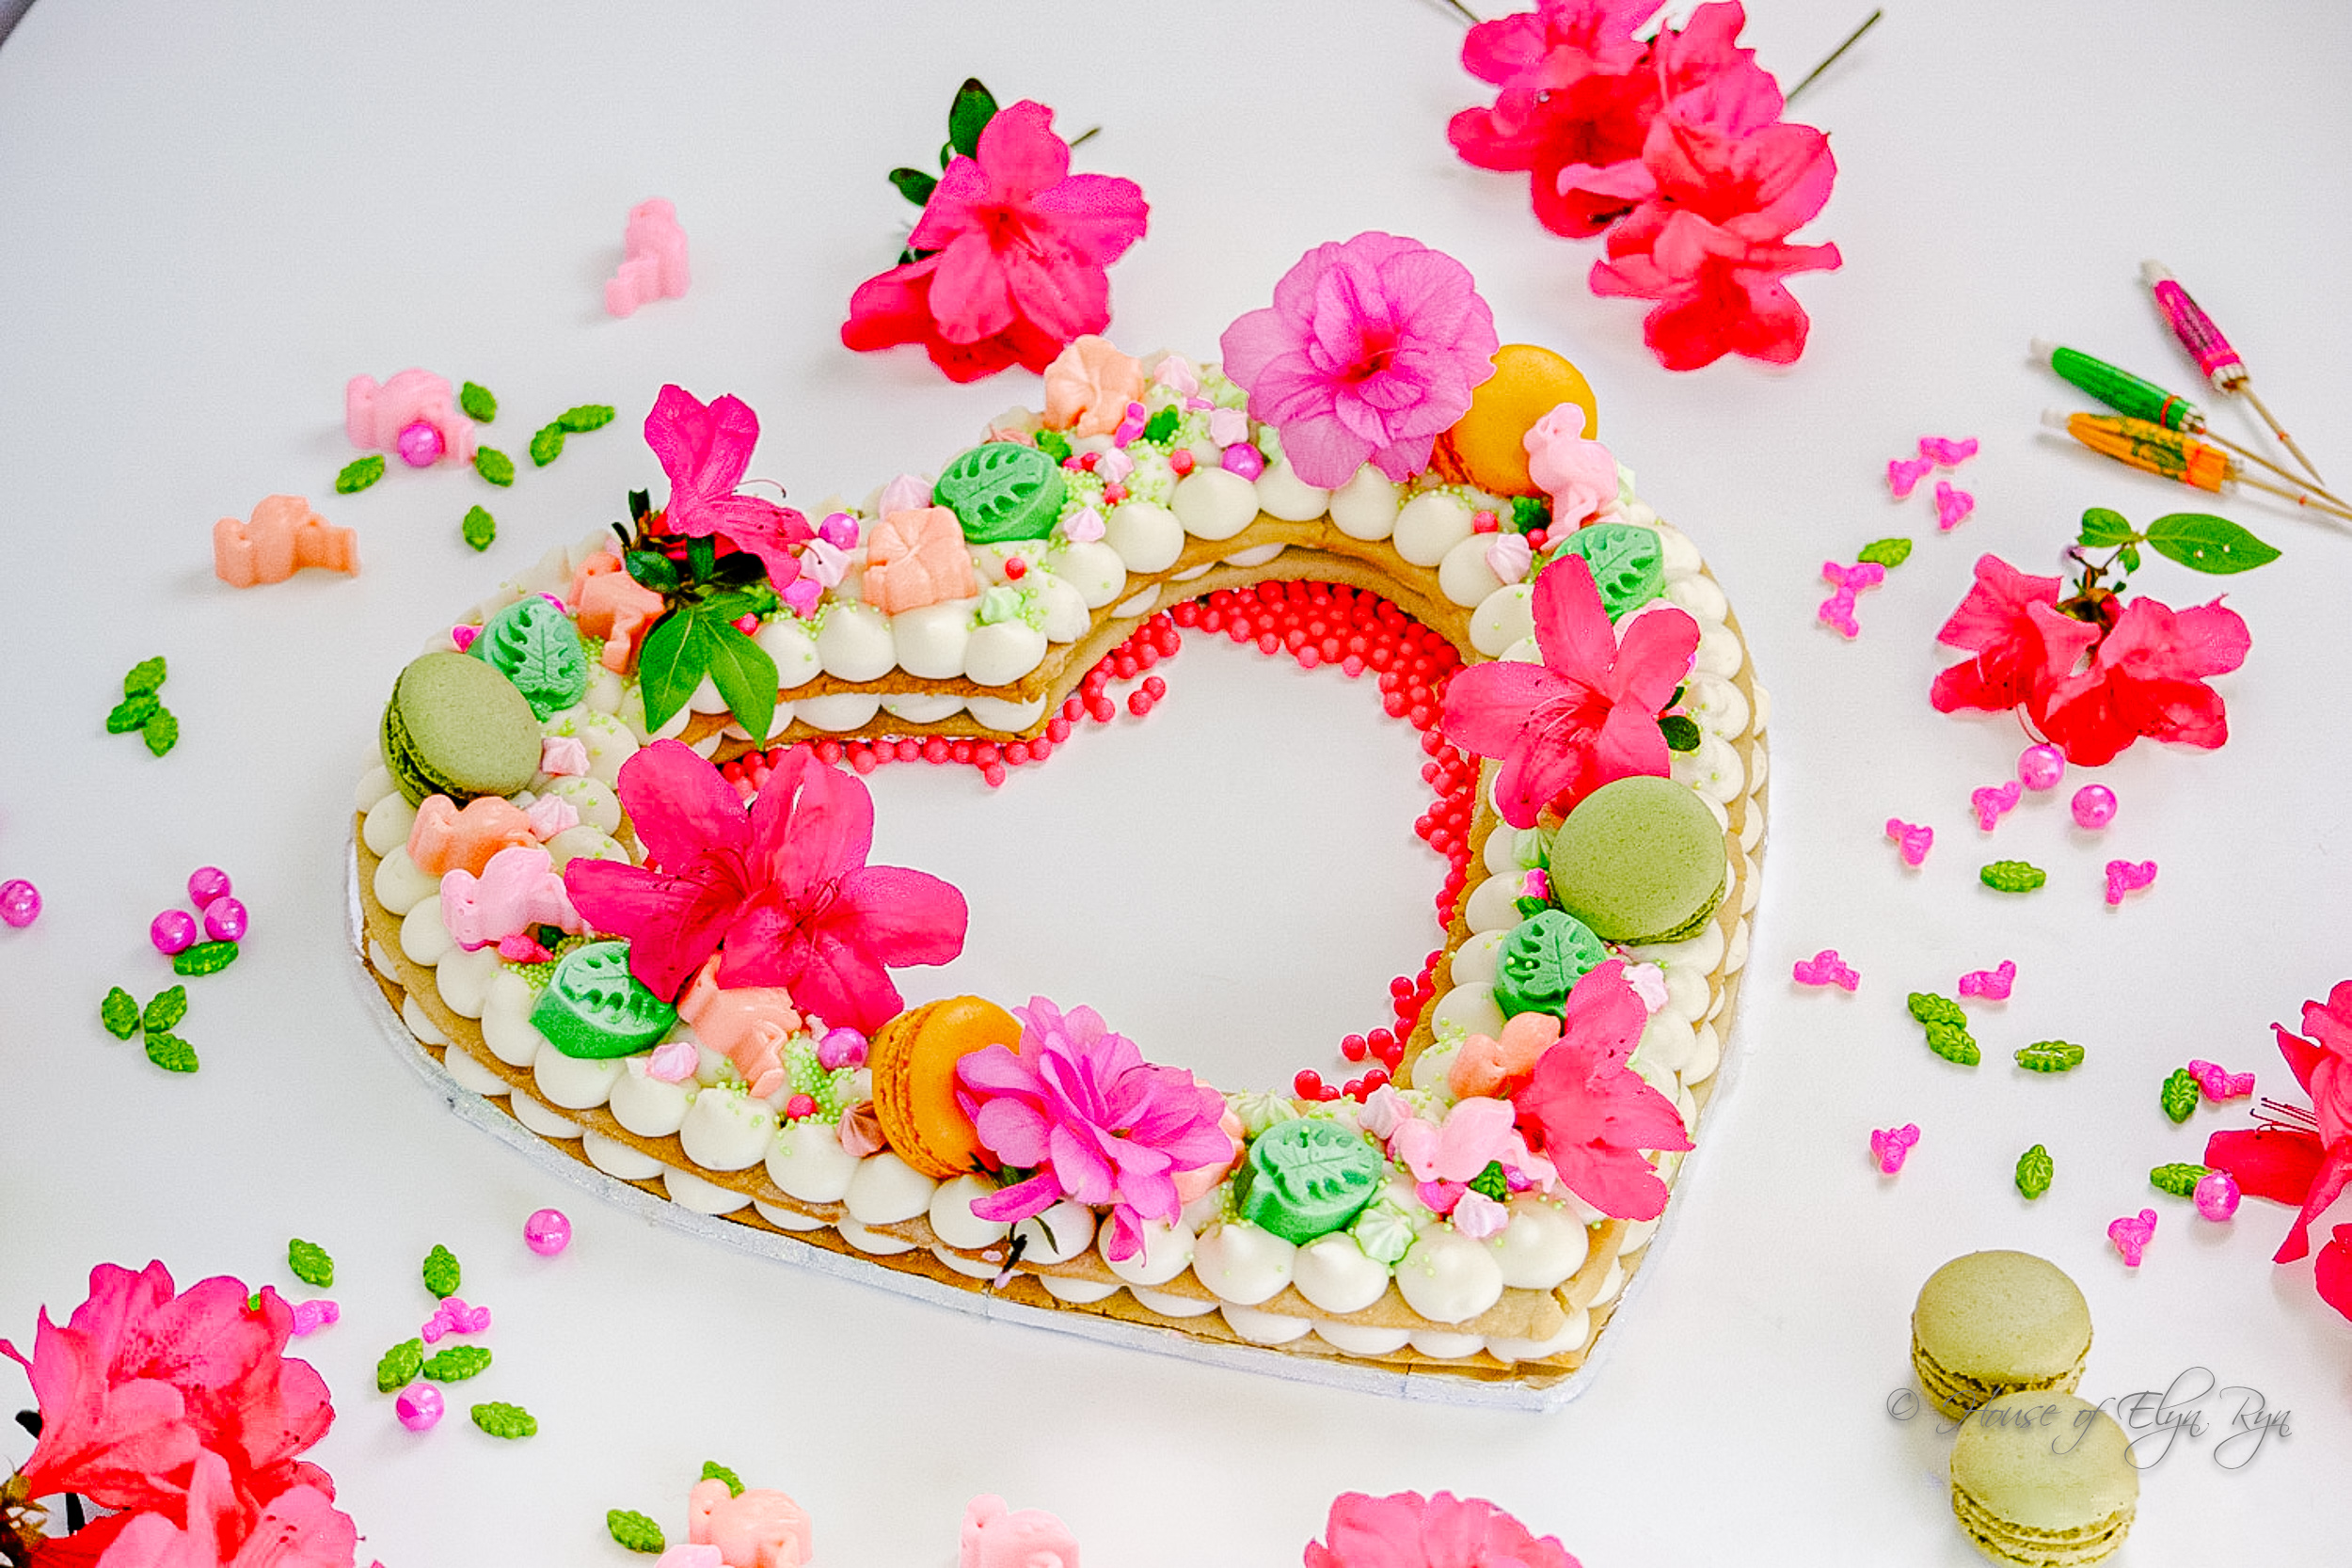
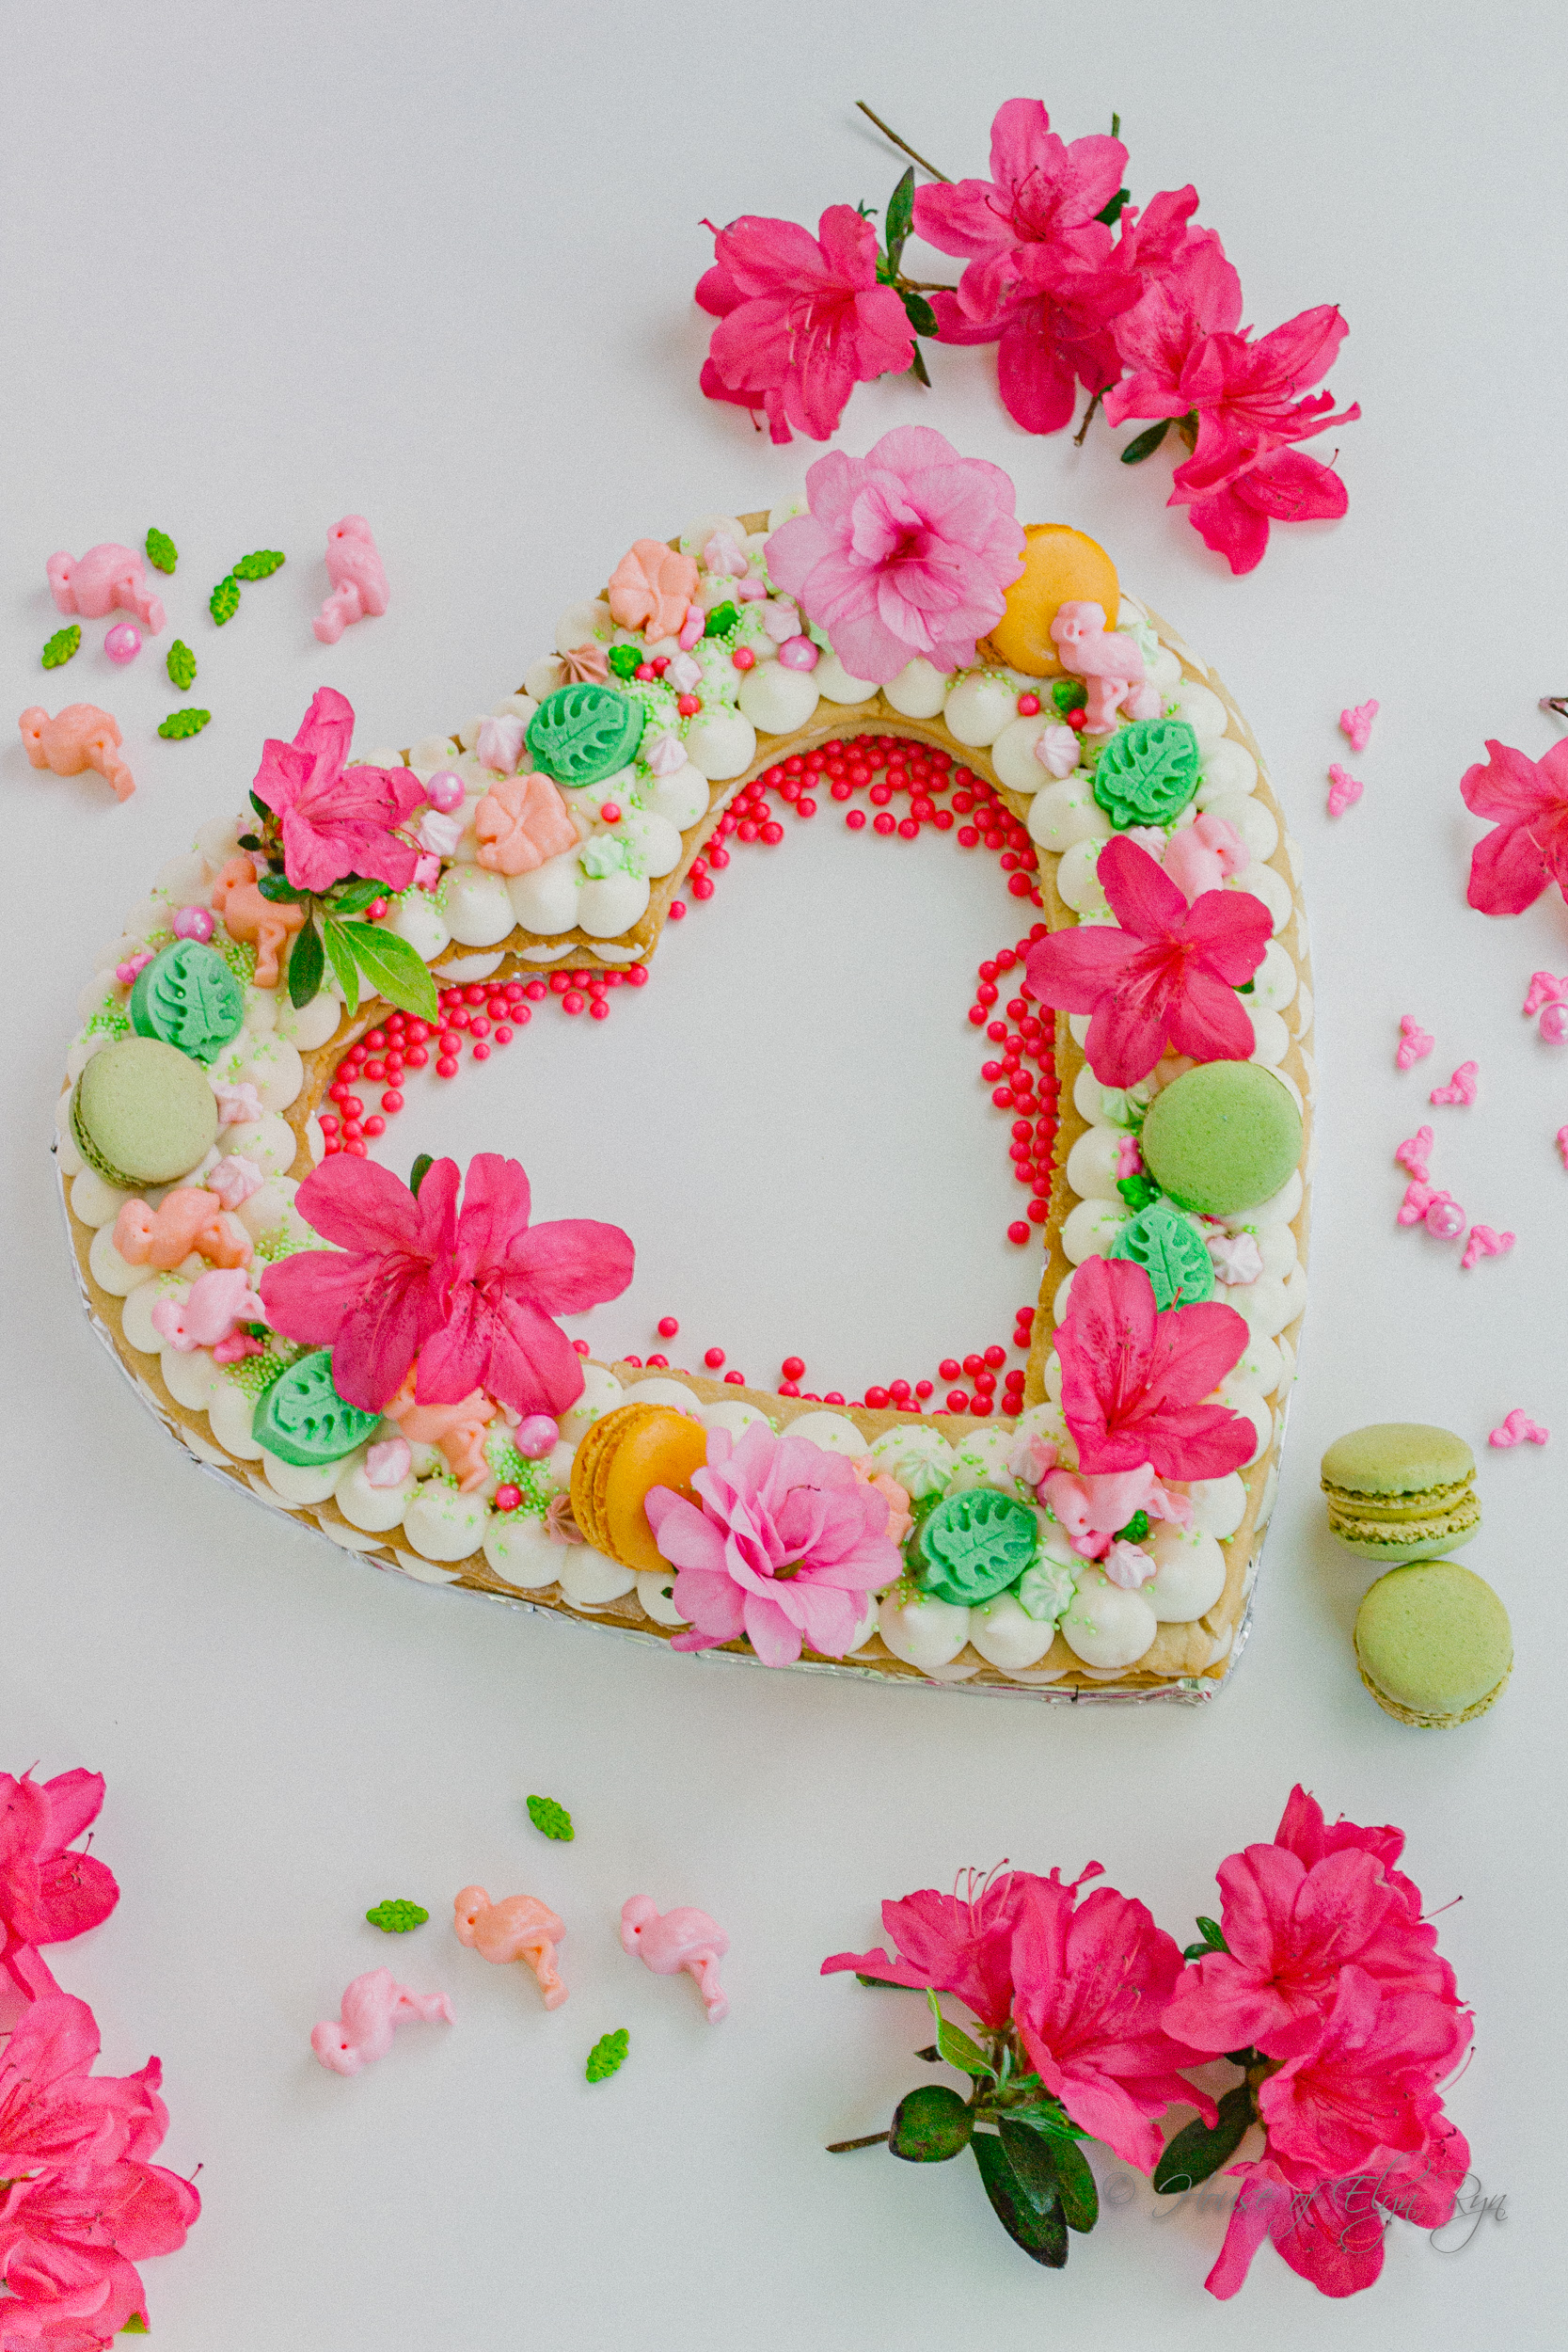
How I Decorated This Heart Cream Tart
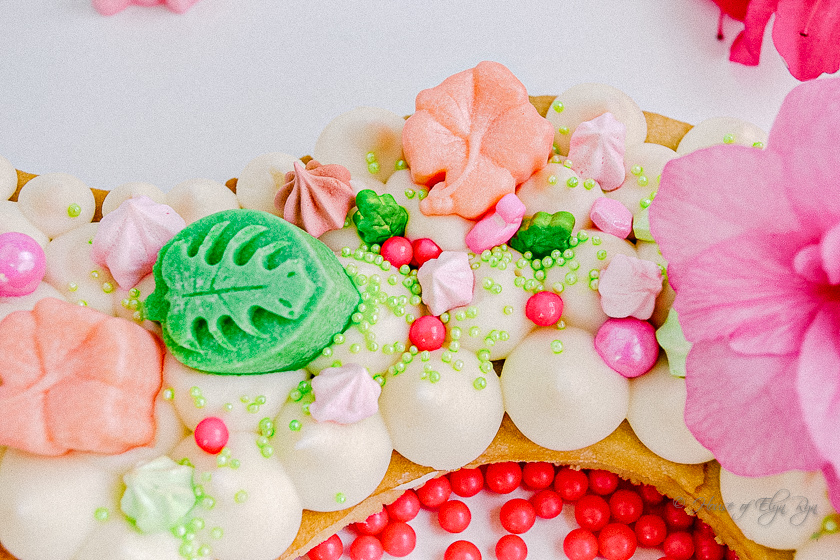
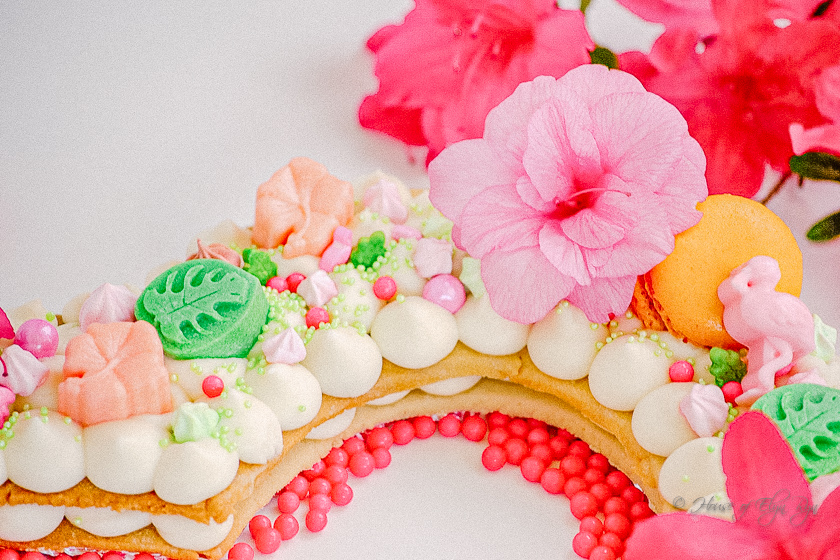
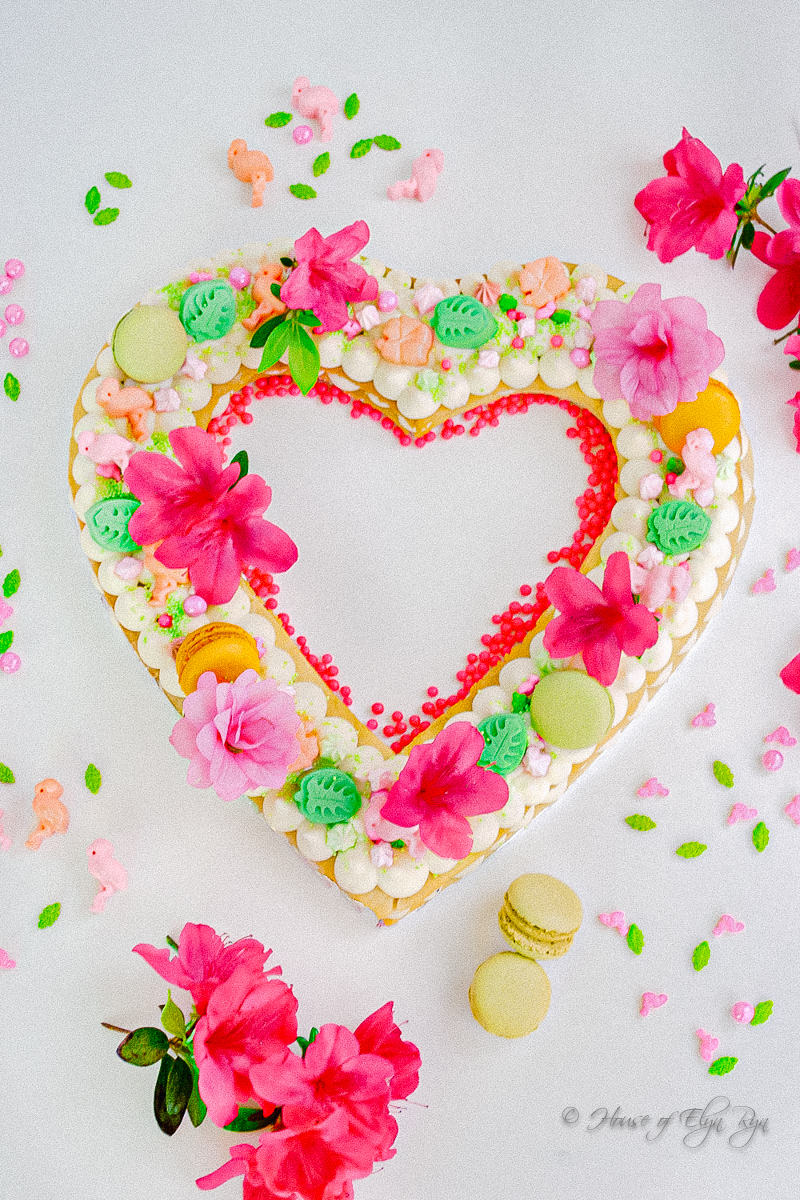
For this tart, I started with large heart-shaped cookies. Then I chose shades of pink and found flamingo candy sprinkles to enhance its look. I made larger flamingos and monstera tropical leaves using a candy mold filled with colored white chocolate. Additionally, I incorporated various sprinkles and arranged a few macarons for decoration.
Types of Decorations You Might Use
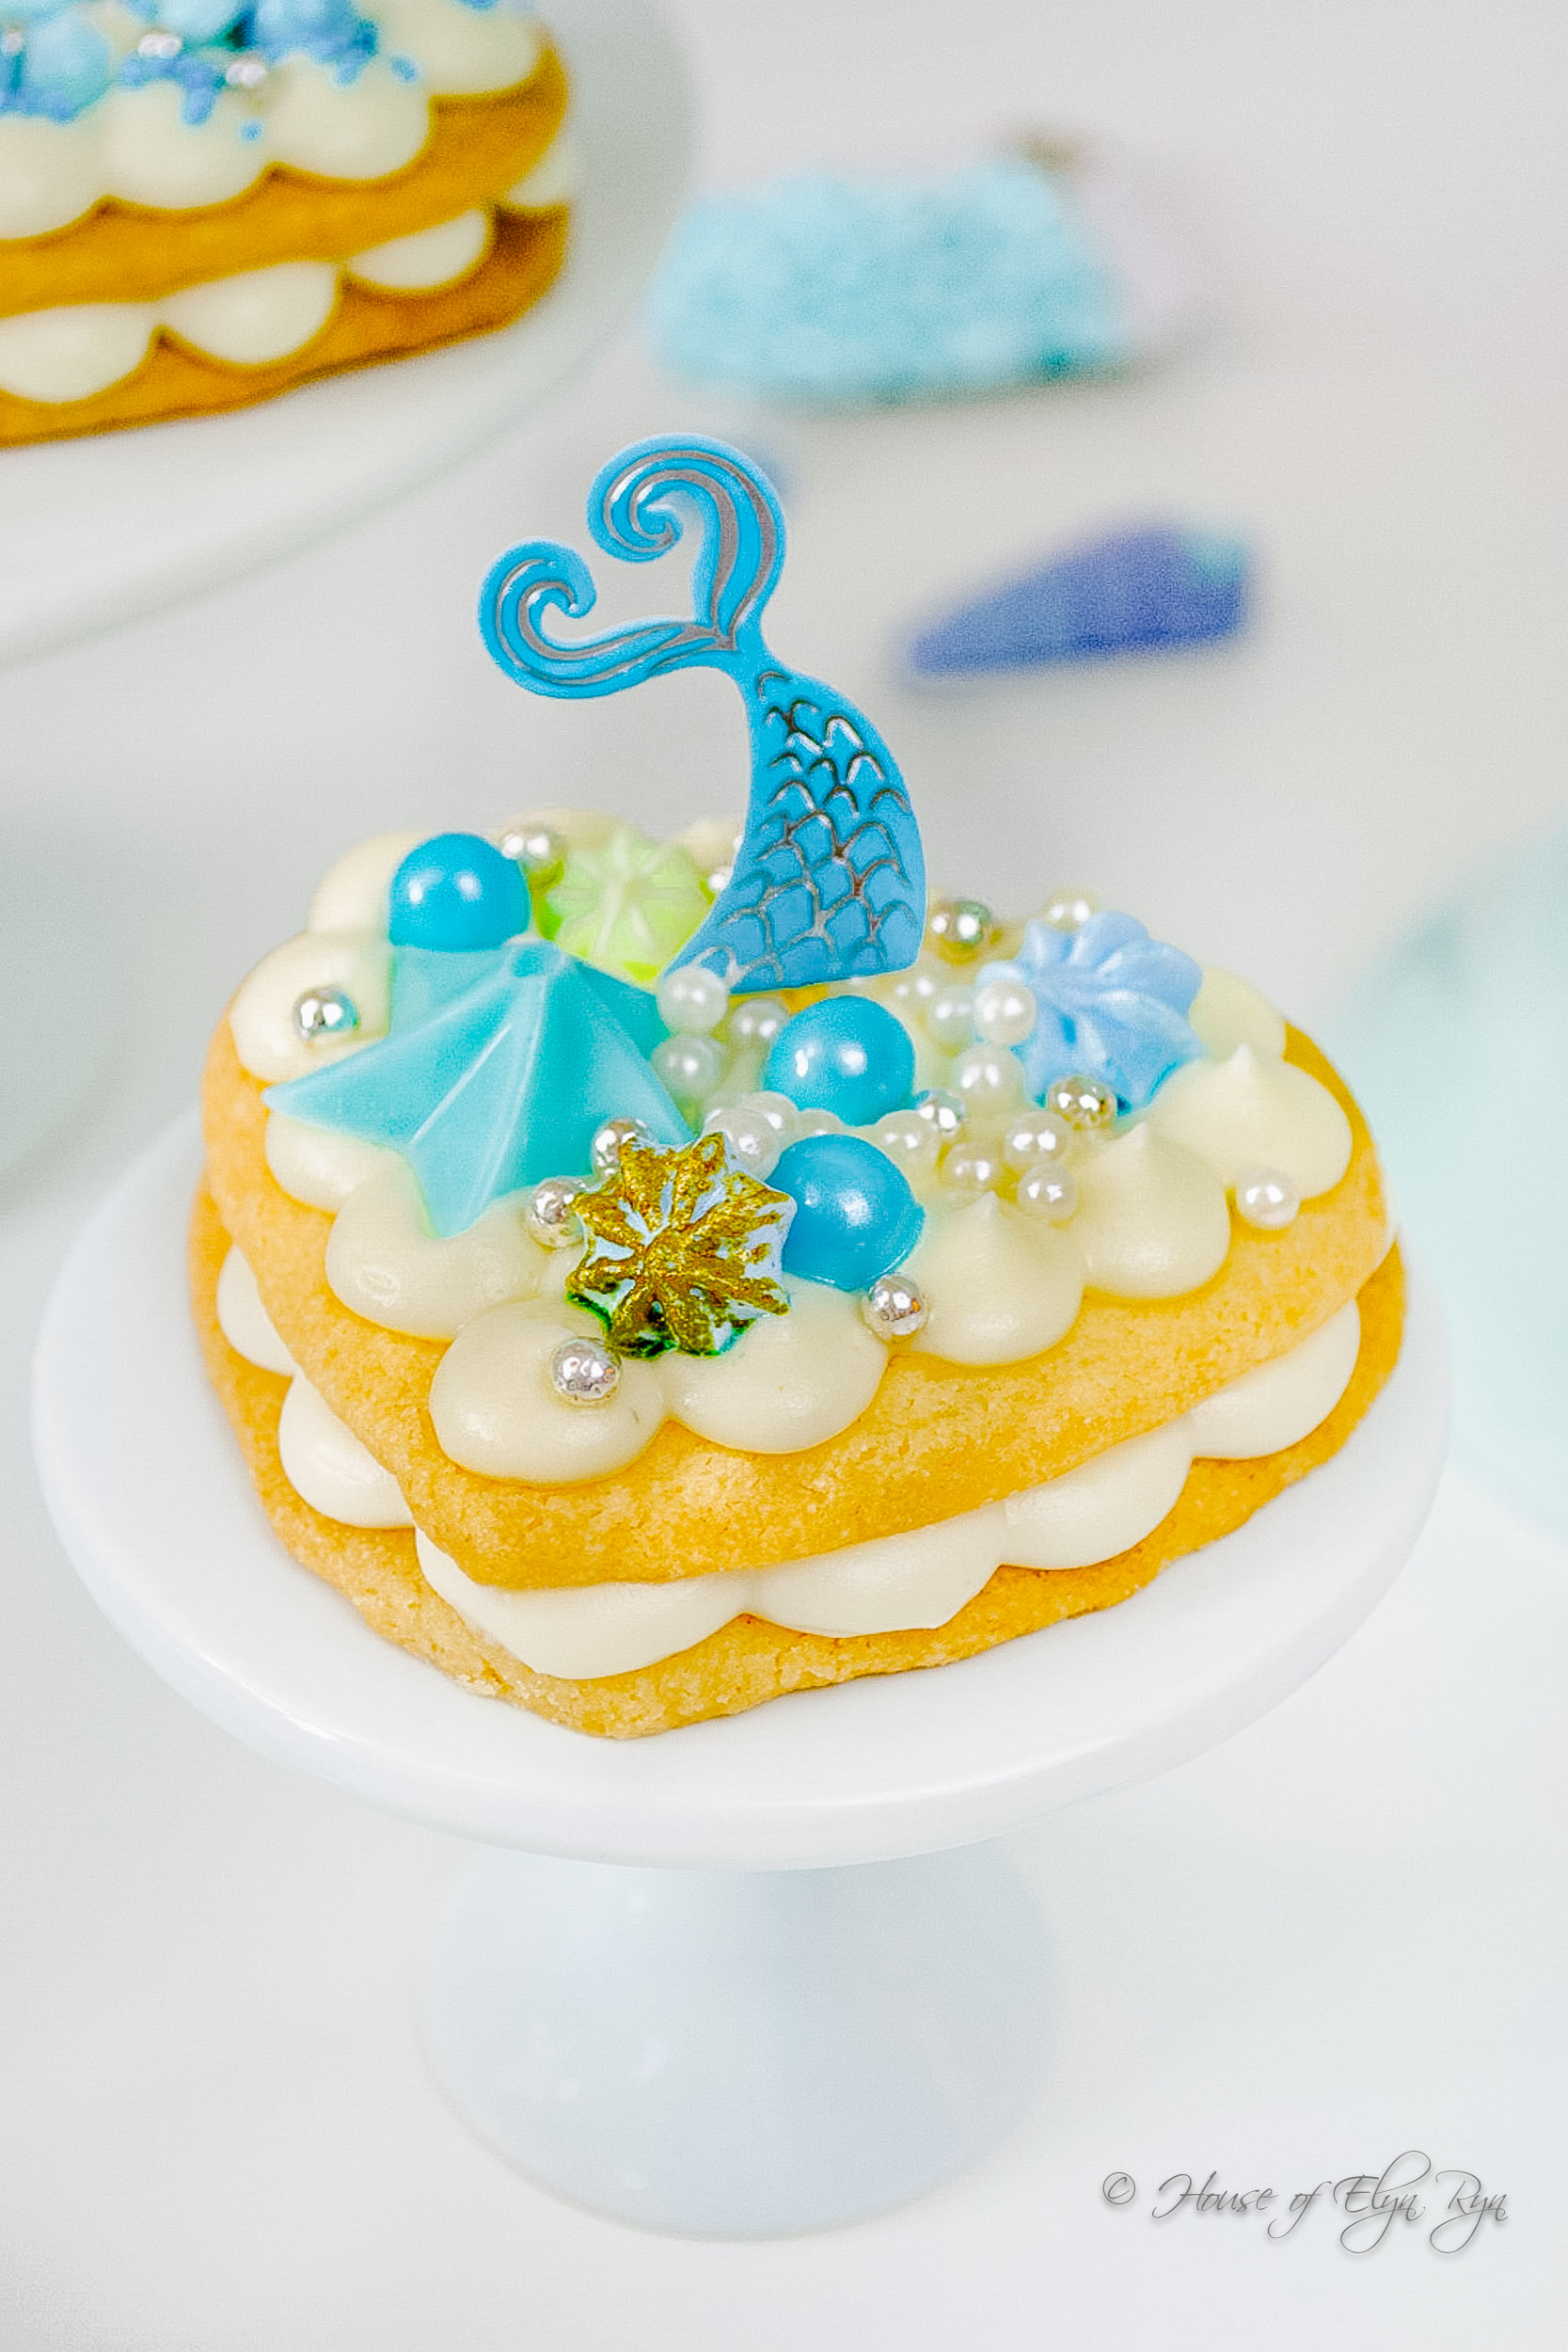
When it comes to decorating cream tarts, the possibilities are endless, allowing you to showcase your creativity. Start with a generous piping of stabilized whipped cream to create a lush surface of evenly spaced dots. Next, embellish the tart with sprinkles in themed shapes and colors for added flair. You can also incorporate fruits like fresh berries—strawberries, blueberries, or raspberries—to introduce another burst of color and flavor.
For a playful touch, consider adding macarons in complementary colors to elevate the presentation. If you want a whimsical aesthetic, try including candy accents, such as chocolate-covered treats or decorative candy sprinkles, to finish off your masterpiece. With these options, you can create a visually stunning and delicious cream tart that will delight everyone!
Additionally, edible flowers such as pansies or violets can add a beautiful, organic look. When using fresh flowers, remember to dip each stem in white chocolate to seal it properly. If opting for faux flowers, ensure they are clean and sanitized by washing and thoroughly drying them. Then wrap the ends in plastic wrap or aluminum foil before inserting them into the cake.
Be careful adding meringue cookies or other items that can become soggy easily if they come into contact with the cream. Save these types of decorations to add just before serving the heart cream tart.
Creating the Heart Template
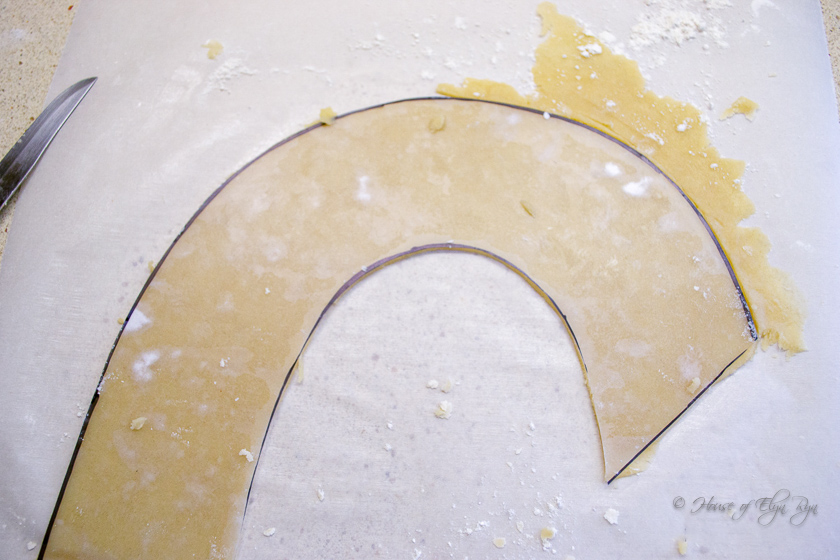
To create a heart template, I first cut a heart-shaped stencil from plastic, measuring approximately 13.5 x 13.5 inches, making it reusable. (Click here to link to the template.) You only need half the heart stencil because you can cut the dough for one side, flip the stencil over, and cut the other side of the dough heart from the same stencil.
As I worked with the two cookie pieces, I pressed them together to seal. I used two pieces of parchment paper while rolling out the dough, which made it easier to manage each piece individually.
Baking and Assembling the Heart Cream Tart
After baking the large heart cookie, be careful, as it can be fragile. If any breaks occur, don’t worry—your decorations will easily cover up these mishaps. For the tart, I created a cardboard heart from the stencil and wrapped it in aluminum foil, providing a perfect tray to hold the tart. To move it around, I found it helpful to slide it onto a flat cookie sheet.
Enjoying the Finished Heart Cream Tart
The cream for this tart is a mixture of sweetened cream cheese and heavy whipping cream, resulting in a delicious treat! Interestingly, cream tarts have two distinct textures. When consumed freshly made, they are crispy and crunchy, thanks to the cookie. However, if left to sit for a while, they become softer as the cream softens the cookie layers.
Storage
To store your Heart Cream Tart, cover it and refrigerate it. It’s best eaten within 1-2 days of preparation. Enjoy!
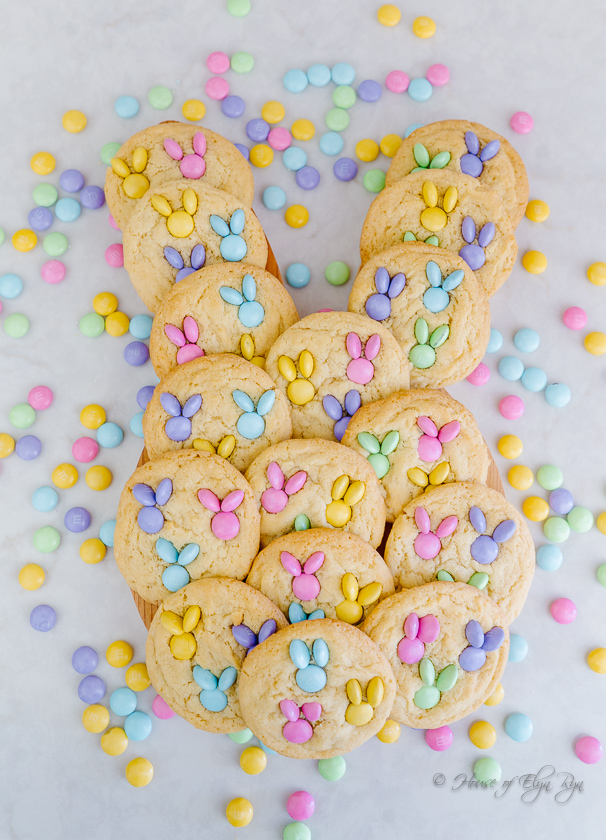
Other Recipes You Might Like
Click on each name or photo to link to the recipe.
Heart Cream Tart
Equipment
- heart template 14 x 14 inches (see Heart Template in Notes below for link to template)
- parchment paper
- piping bag
- medium round piping tip
Ingredients
Cookie Ingredients
- 14 tablespoons unsalted butter, softened
- 1 large egg
- ⅔ cup powdered sugar
- ½ teaspoon almond extract (optional)
- ½ teaspoon vanilla extract
- 2 ½ cups all-purpose flour
- ¾ cup almond meal
- ¼ teaspoon salt
Cream Ingredients
- 8 ounces cream cheese
- 1 cup heavy cream
- ⅔ cup sugar
- 1 teaspoon vanilla extract
Other Materials
- washed and dried flowers
- berries, candies, sprinkles, macarons, cookies, etc.
Instructions
Cookie
- Sift together the flour, almond meal, and salt. Sit aside.
- In a mixing bowl, beat together the butter and powdered sugar until creamy. Scrape down the sides and bottom of the bowl.
- Add the egg, almond extract, and vanilla extract, and mix to combine.
- Add the dry ingredients and beat on low speed until incorporated.
- Divide the dough in half and make two balls. Flatten the balls, cover them tightly with plastic wrap, and refrigerate for 1 hour.
- Dust a working surface with flour. Roll out one of the dough balls about 1/4 inch thick. Using the heart stencil or another stencil shape of your choice, place it on the dough and cut around it with a knife. Repeat to cut out another cookie. This will let you make a two-layer tart.
- Bake the cookies for 12-15 minutes, until golden, rotating the pan once if necessary to ensure even baking. Cool to room temperature.
Cream Instructions
- Beat together the cream cheese and sugar for 2 minutes. Add the heavy cream and vanilla extract. Beat on medium-high for 2-4 minutes, until thick and creamy.
Decorating Instructions
- Pipe round dots on the first cookie to cover the entire surface. When finished, layer the second cookie on top.
- Pipe round dots on the top cookie to cover the entire surface.
- Decorate in your choice of color and theme with edible or faux flowers, fruit, cookies, and/or candies.