
Peanut Butter Bunny Eggs offer a delicious blend of rich chocolate and creamy peanut butter, resulting in an irresistible treat. Ideal for any occasion, these easy-to-make candies use a three-part mold system to ensure perfectly shaped eggs every time.
Introduction to Making Peanut Butter Bunny Eggs
Making delicious chocolate eggs is easy with a three-part mold. This system eliminates the need to hand-shape the filling and let it chill to hold its shape. There is no dipping in chocolate with a fork. Instead, the mold does all the work so that you can make perfect eggs every time!

The Mold Explained
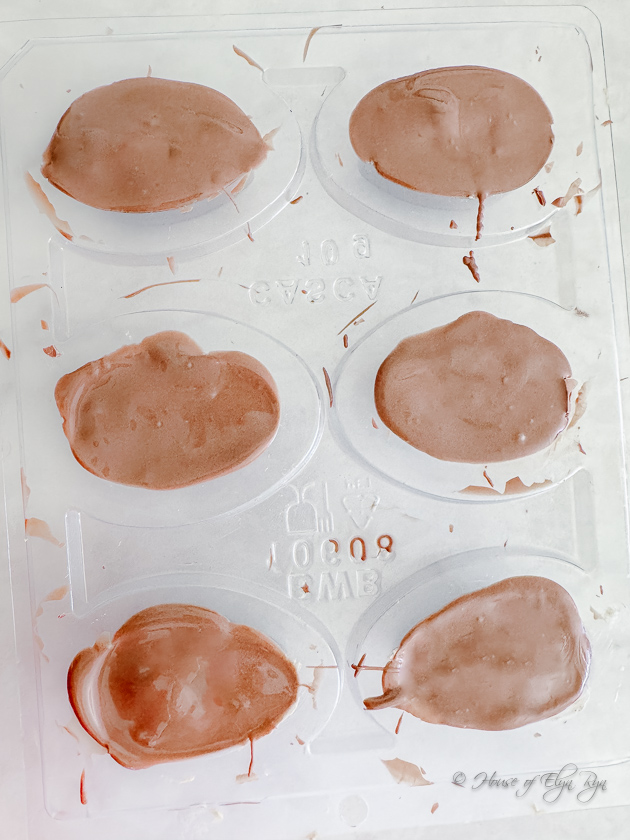
The 3-part mold consists of a larger hard-plastic egg mold, individual blue molds that are slightly smaller, and a third hard-plastic mold with the smallest cavities. The first part of the mold is a rigid plastic piece that shapes the front of the egg’s shell. You pour melted chocolate into it. Then you add the flexible blue liner, which helps create the chocolate shells and acts as a buffer, protecting the delicate chocolate from the rigid molds.
Finally, add the third mold. Its egg cavities are smaller than both the first mold and the blue liners. When you add it, it exerts pressure, spreading the chocolate into a thin, consistent coating and creating a perfect outer shell, complete with bunny ears. When the chocolate hardens, you remove the last mold and the individual blue ones, leaving the chocolate in the first mold. Then the fun part begins — adding a peanut butter filling.
Chocolate Selection for Peanut Butter Bunny Eggs
Make the chocolate egg shells using high-quality chocolate, such as Merckens Milk Chocolate Coating Wafers, or dark or white chocolate. If you use chocolate chips, add a small amount of coconut oil before melting them to prevent them from sticking to the mold. The oil will also help ensure the eggs have a glossy exterior.
Melting the Chocolate
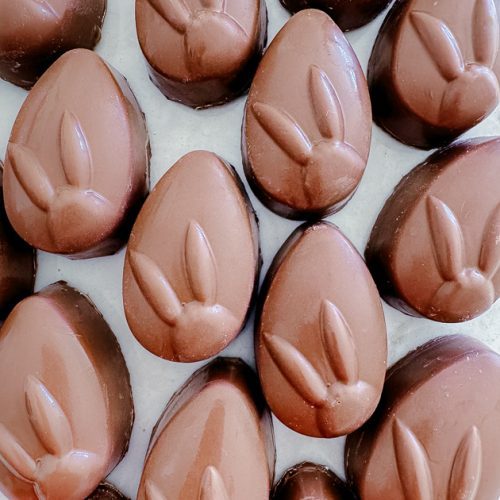
Melt a small batch of chocolate in a microwaveable container with a handle. The recommended molds make six eggs at a time and feature an embossed bunny head on top, giving them a unique and adorable look. Melt a small amount of chocolate for each batch of shells, as any leftover chocolate will harden until the next task.
Using Molds to Make Peanut Butter Bunny Eggs
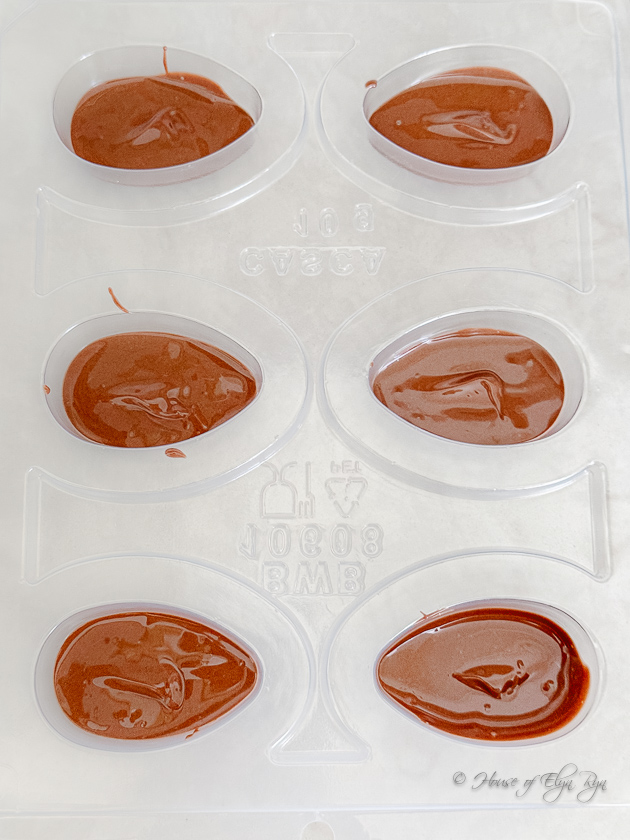
- Melt the chocolate using the 30-second interval method, stirring between each interval. It usually takes only two intervals to melt the chocolate. Then stir until all the wafers melt. Finally, pour the chocolate into the mold with the largest indentations, filling them to the fill lines.
- Tap the mold on the countertop to release any air bubbles.
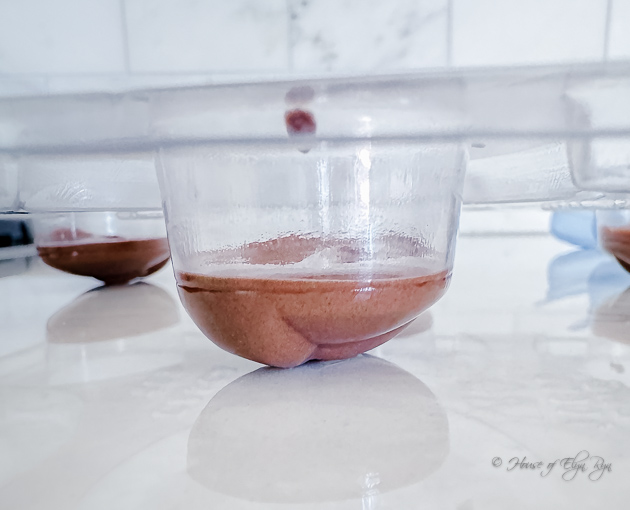
- Press the individual blue liners into the chocolate in each cavity.
- Add the third part of the mold and press it firmly into the blue liners to ensure the chocolate coats the sides of the first mold evenly.
- Place the mold in the refrigerator for 15 minutes to allow the chocolate to harden.
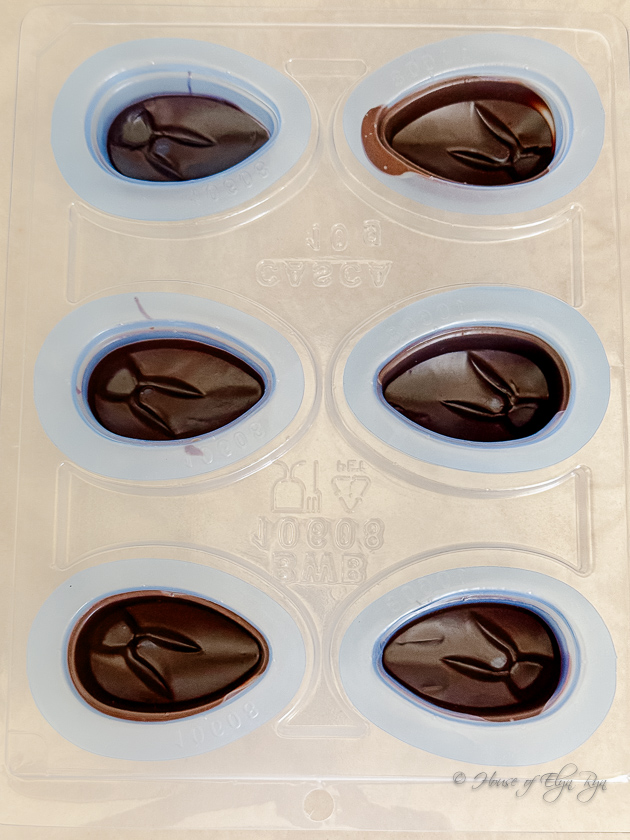
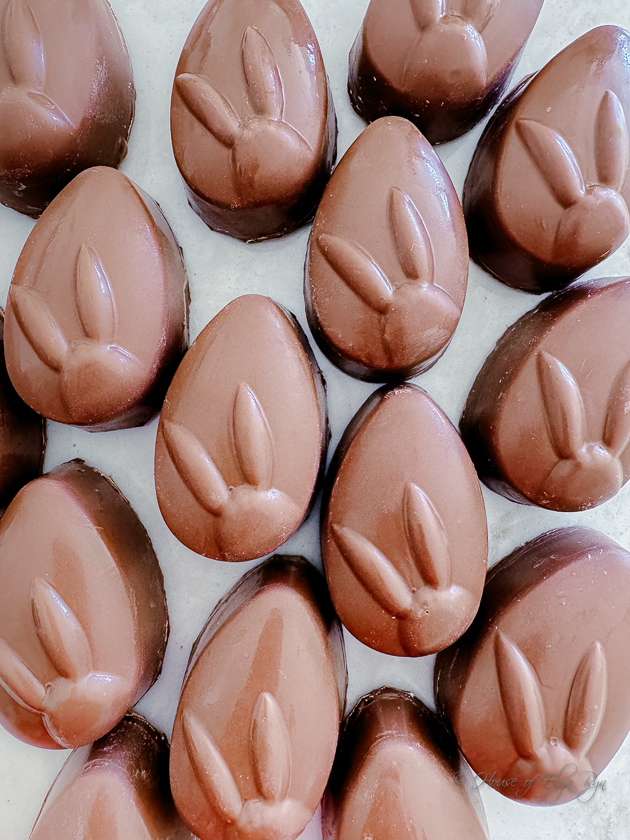
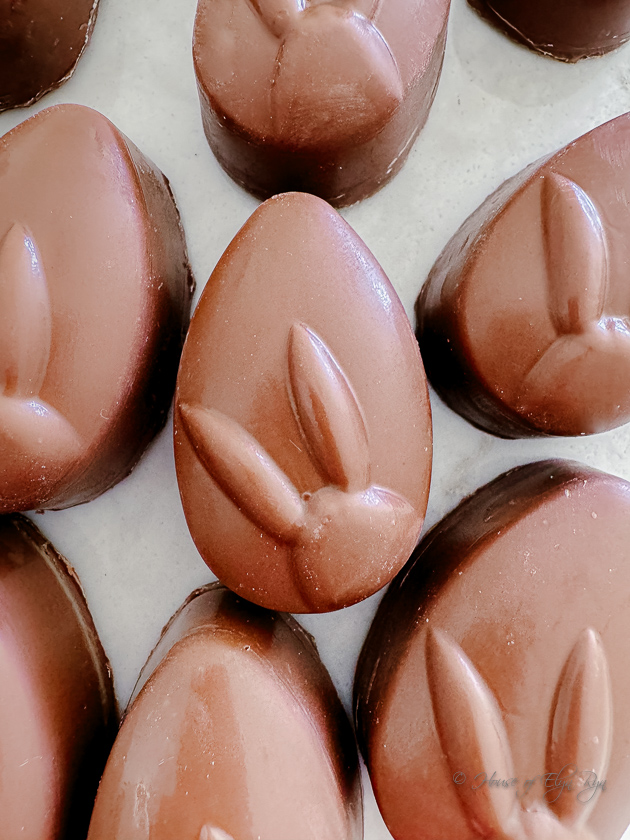
- Once hardened, remove the top mold and carefully pull out the individual blue liners. The egg shells will come out of the bottom mold section along with the liners. Gently peel off the soft blue liners from the chocolate egg shells to reveal the perfect egg shells.
Peanut Butter Filling
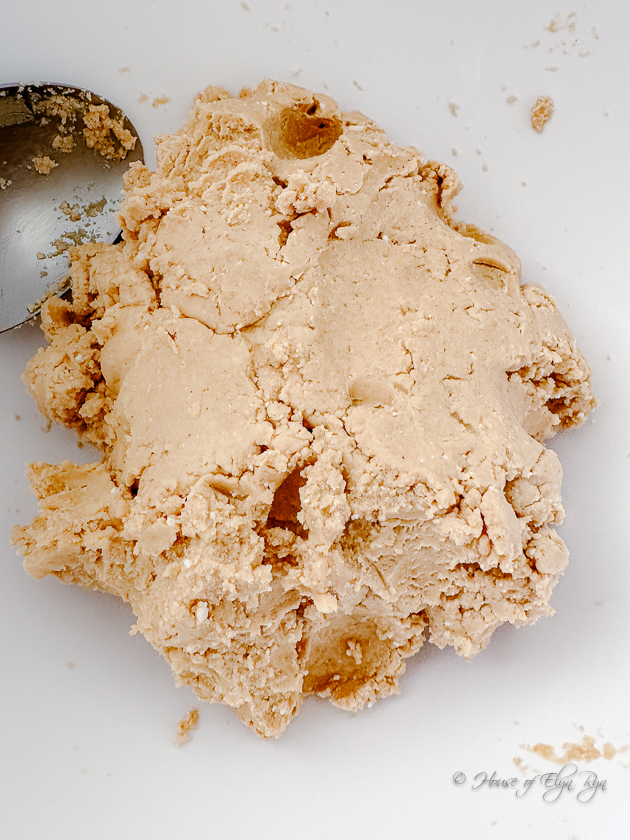
The filling consists mainly of peanut butter, confectioners’ sugar, and butter. For optimal results, use room-temperature butter for easier hand mixing. The filling should be stiff, similar to Reese’s peanut butter eggs. If it’s too soft, add more confectioners’ sugar; if it’s too stiff, mix in additional peanut butter. The filling can be stored in the refrigerator in an airtight container. It can be softened again with peanut butter if it dries out.
Adding the Filling
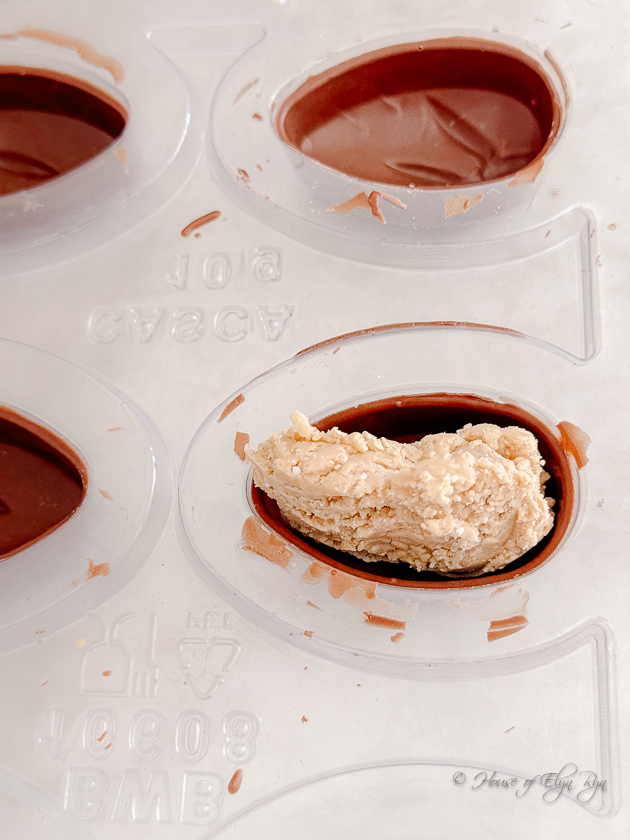
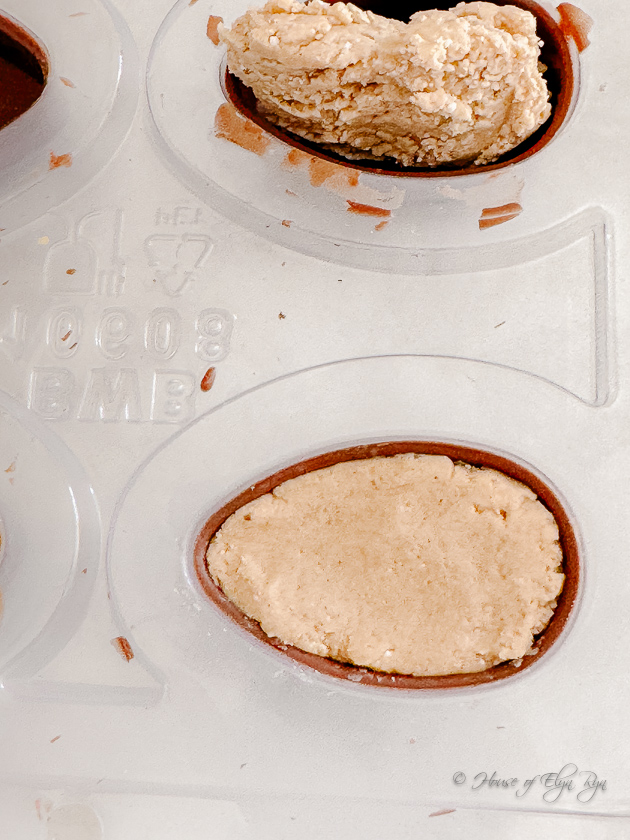
Carefully place the chocolate egg tops back into the bottom molds for support and add the peanut butter filling, pressing it with your finger or a spoon to level it. Add more filling if necessary until the eggs are packed and filled to the top.
Final Chocolate Layer for Peanut Butter Bunny Eggs
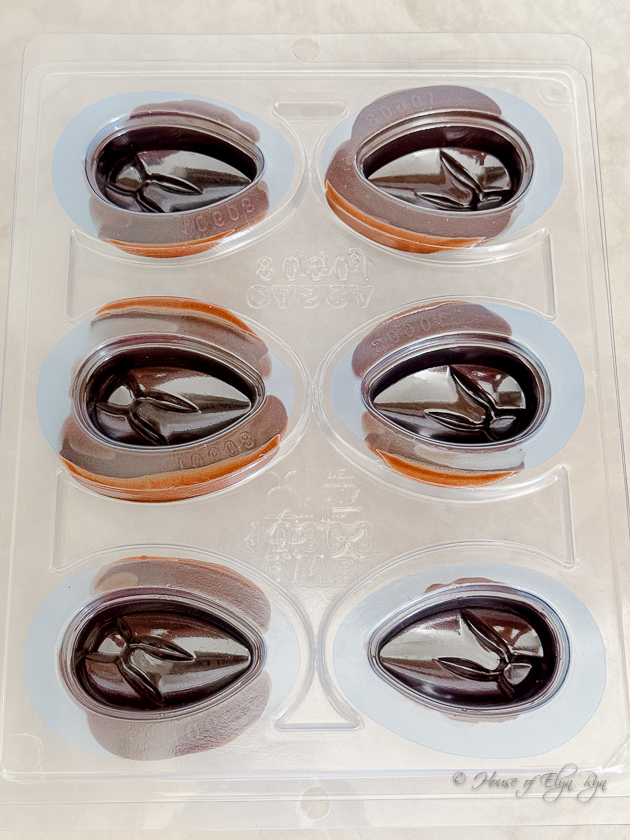
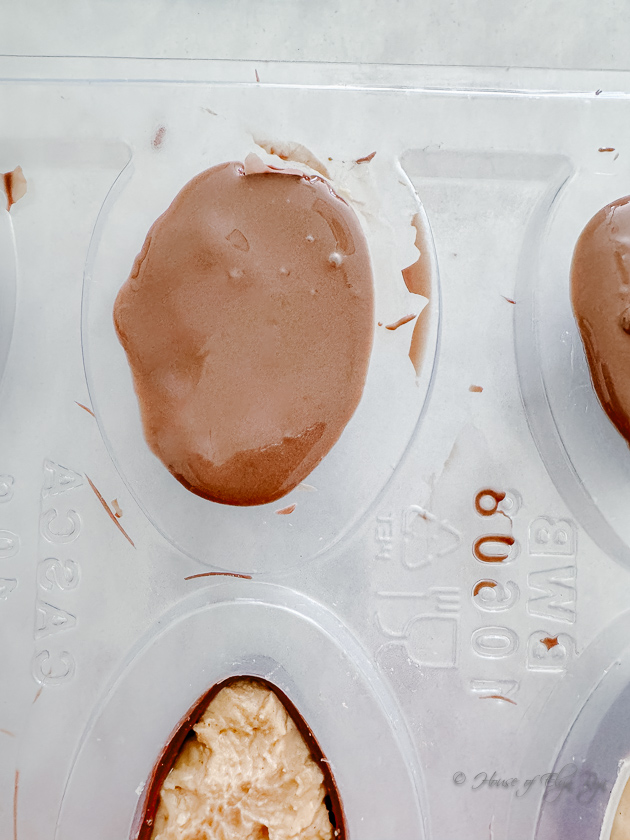
Melt more chocolate, then spoon or pour it over the filling and spread it evenly with a spoon. Do not worry if it spills over the sides, as it can be easily removed later. Return the mold to the refrigerator for an additional 15 minutes to allow the chocolate to harden.
Releasing the Eggs
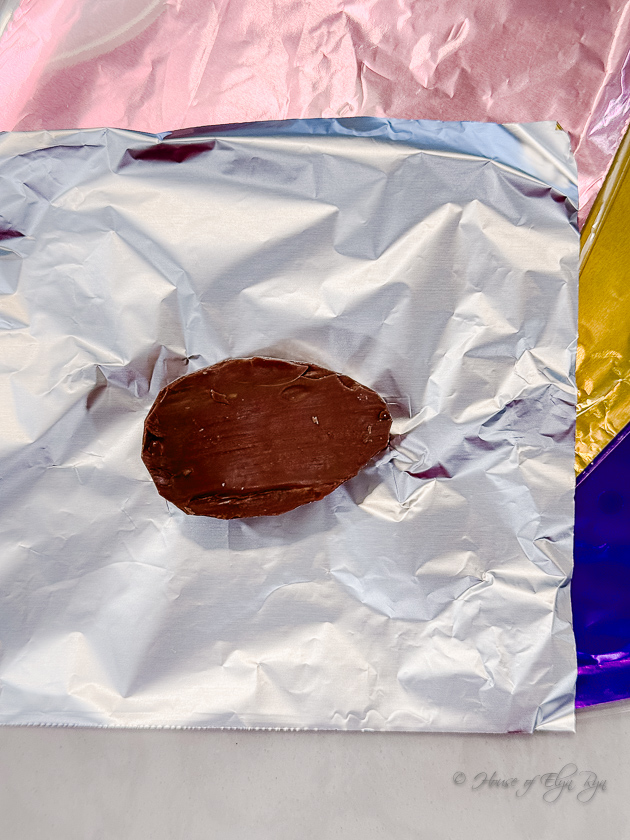
After chilling, flip the mold upside down to release all the eggs. They will fall out effortlessly. Be careful not to hold the mold too high above the countertop so the eggs are not damaged upon release. Use a sharp knife to trim the bottoms of the eggs to remove excess chocolate. The eggs are finished and have a cute bunny embossed on the top!
Decorative Touches
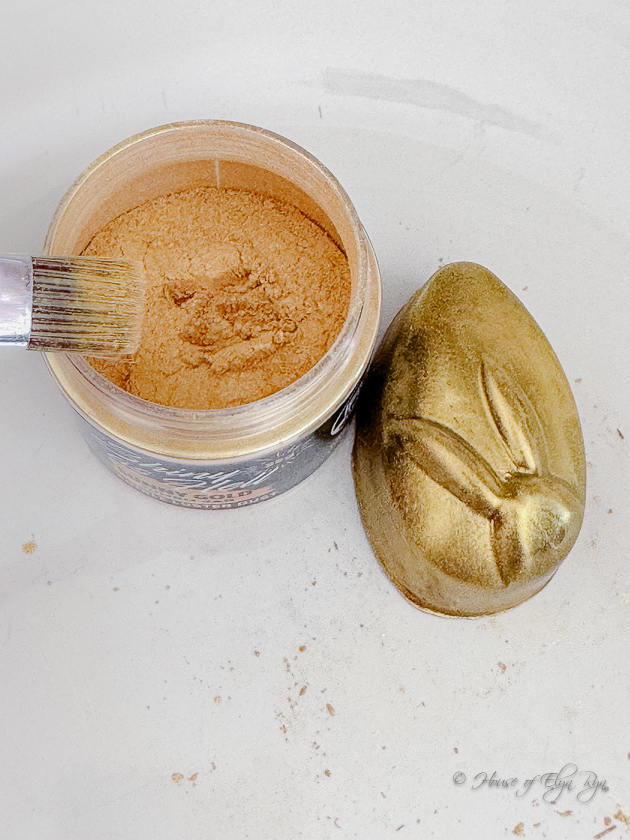
For a festive look, brush the eggs with gold powder luster dust to create golden eggs.
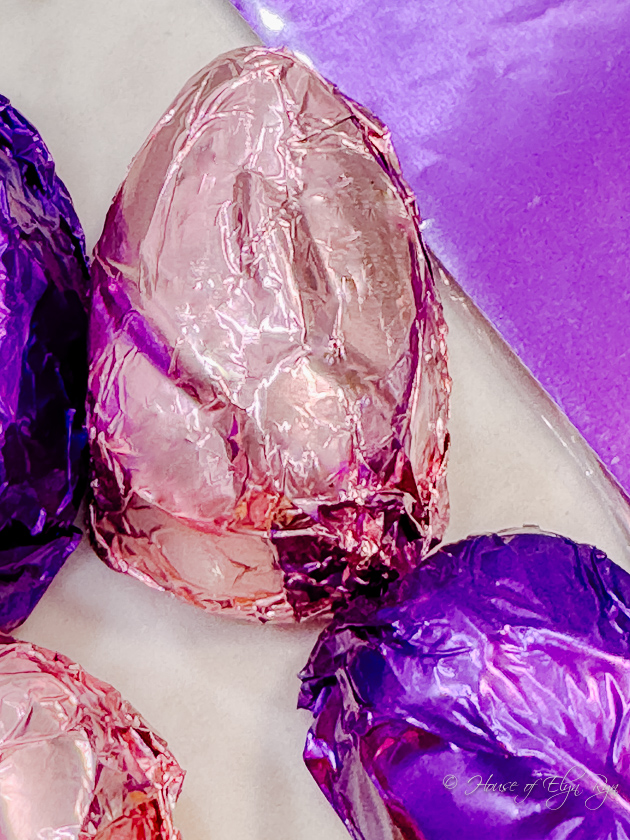
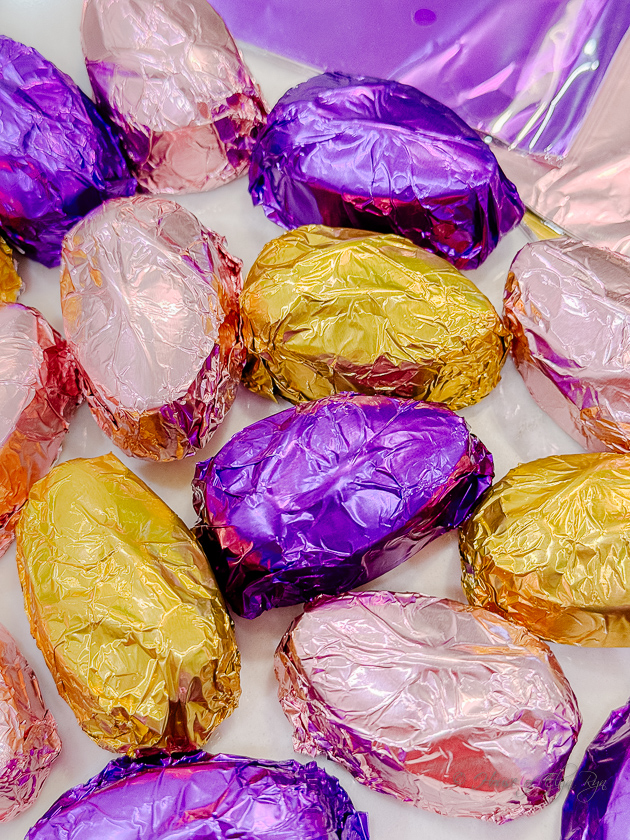
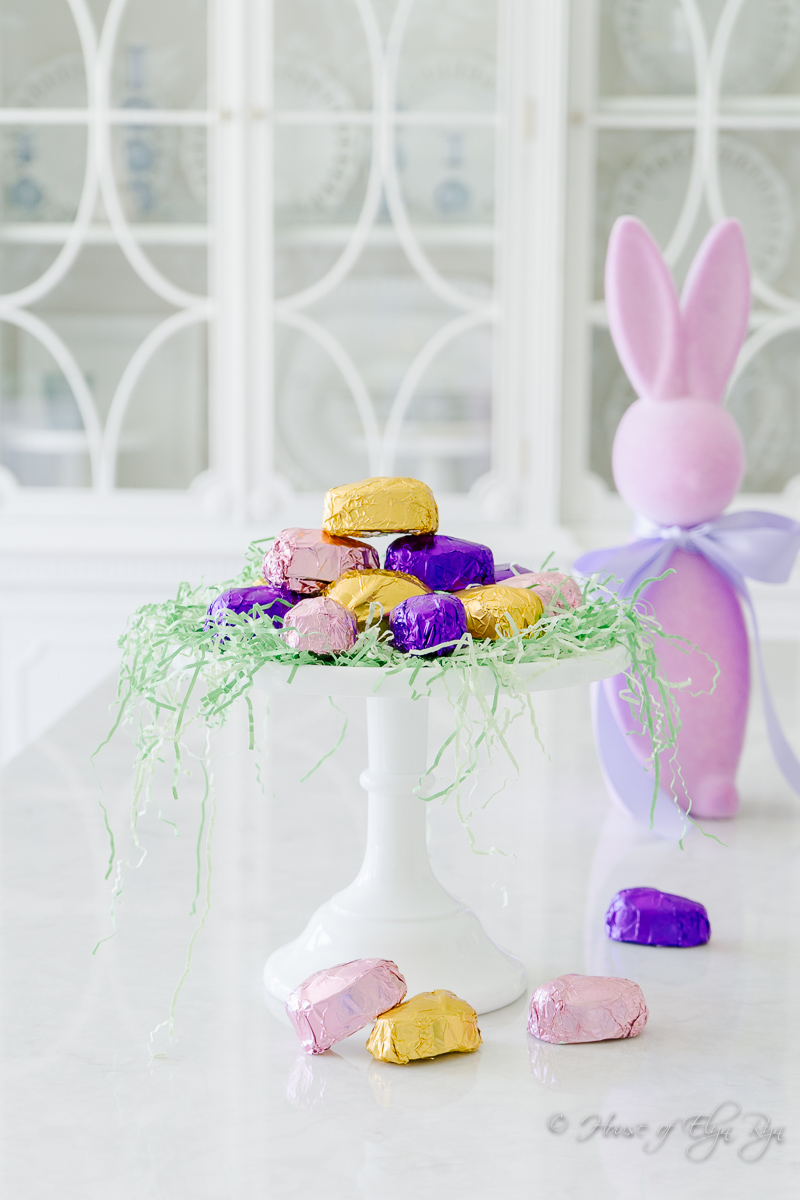
Wrapping them in 4-inch colorful foil wrappers adds a beautiful presentation. Enjoy making and sharing your delightful Peanut Butter Chocolate Eggs!
Other Peanut Butter Recipes You Might Enjoy
Click on each name or photo to link to the recipe.
Peanut Butter Bunny Eggs That Will Make You Smile
Equipment
- 3-part mold egg mold
- microwave-safe container or measuring cup
Ingredients
Filling
- 4 tablespoons salted butter, room temperature
- 1 cup peanut butter
- 1 teaspoon vanilla extract
- 2 tablespoons powdered milk
- ¼ teaspoon salt
- 2 ¼ cups confectioners' sugar
Chocolate
- 2 pounds chocolate wafers (Merkens milk chocolate recommended)
Instructions
Filling
- Add the butter, peanut butter, vanilla, powdered milk, and salt to a large bowl. Stir until thoroughly mixed.
- Stir in the confectioners' sugar, working with your hands until well combined. The mixture should be stiff, slightly dry, yet easy to form into a ball. If it is too dry, stir in peanut butter to loosen it; if it is too wet, add more confectioners' sugar. Cover and set aside.
Chocolate
- Melt 1/2 cup of chocolate wafers in the microwave for 30 seconds. Stir. Melt again for 30 seconds. Then, stir until entirely melted.
- Pour the chocolate into the bottom mold indentations, filling them to the fill lines. (The bottom mold has the larger egg cavities that the other molds will fit into.) Tap the mold on the countertop to release any air bubbles.
- Fit the individual blue liners into the chocolate; they will squeeze the chocolate around the bottom mold. Add the top mold and press it firmly to ensure the chocolate coats the sides evenly. Place the mold in the refrigerator for 15 minutes to allow the chocolate to harden.
- Once hardened, remove the top mold and carefully pull out the individual molds. Carefully peel off the blue liners from the chocolate to reveal the perfect egg shells.
- Place the chocolate egg shells back into the bottom mold.
- Add the peanut butter filling to each shell, filling them to the tops. Pat the filling into each shell to ensure it fills each shell completely.
- Melt more chocolate and spoon it over the peanut butter, spreading it with the tip of a spoon. This layer makes the back of the eggs.
- Place the eggs in the refrigerator and chill for 15 minutes. Then, remove the mold and turn it upside down on a towel. The eggs will easily release from the mold. Use the towel to prevent any damage when they fall from the mold.