
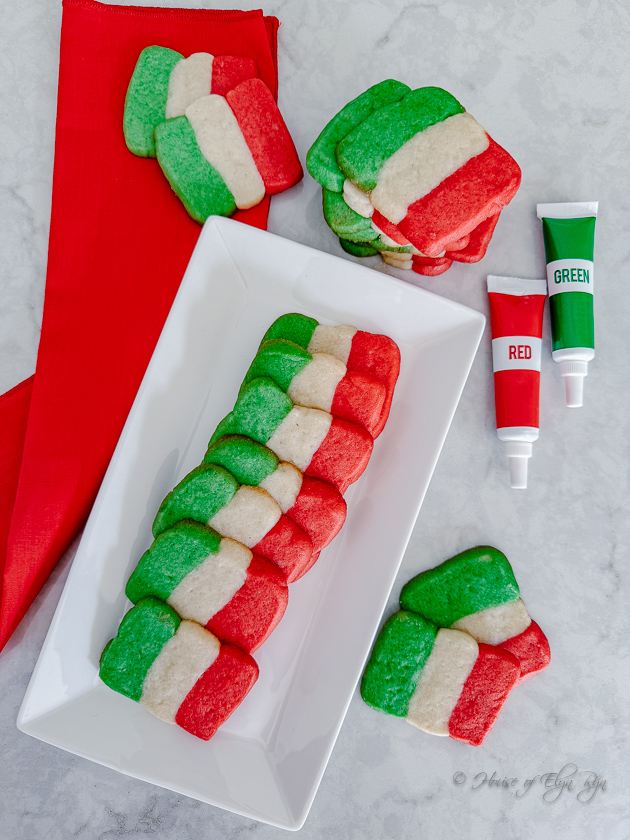
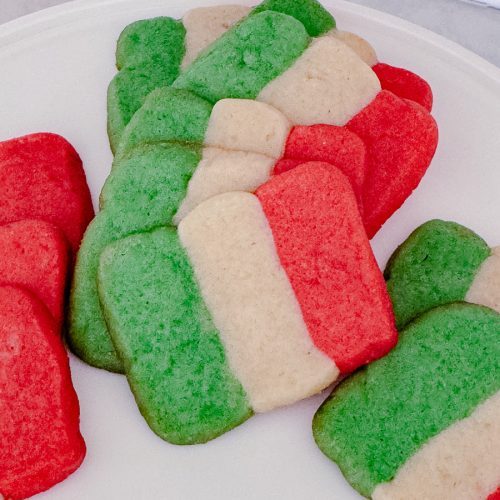
Italian Flag Cookies are the perfect way to kick off your Olympics viewing party, celebrating Italy’s hosting of the Winter Olympics and its rich culinary heritage. The cookies have a delicious buttery richness and striking colors mirroring the Italian flag.
Enjoy the Buttery Crispness of Italian Flag Cookies
Every time the Olympics roll around, I like to make a dish or dessert to represent the host country. In this case, it is Italian Flag Cookies. With their vibrant colors and buttery flavor, these cookies are a big hit. These crunchy cookies are made by layering three cookie dough layers in a specific order. These Italian flag colors are arranged in the order green, white, and red, with green always on the left-hand side. However, you can use these three colors to make other flags by changing the order of the colors.
In addition to representing Italian flags, these cookies make beautiful holiday treats with their traditional Christmas colors.
Create the Cookie Dough
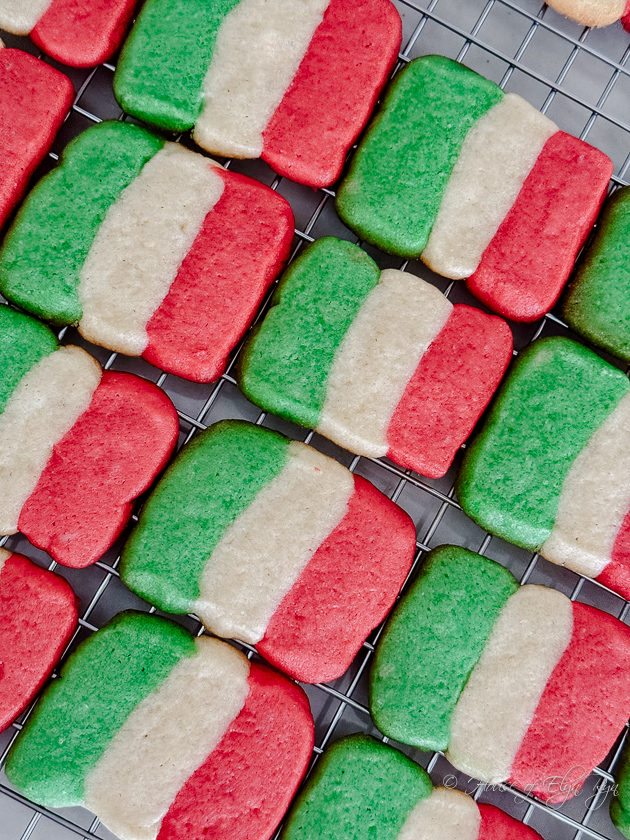
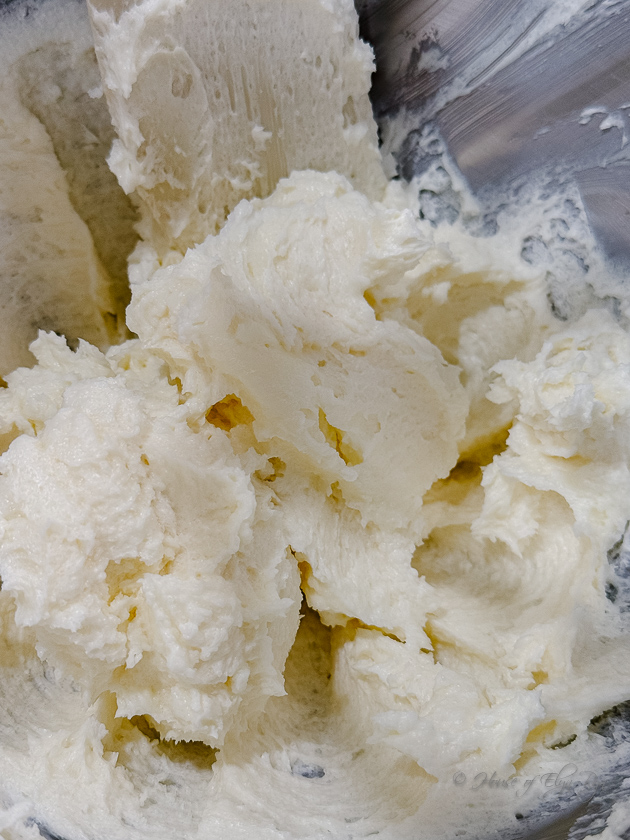
These cookies are crunchy like shortbread. They hold their shape when baked, which keeps the stripes intact. Use softened butter to create the dough. It is best to leave it on the countertop until soft, but it can also be softened in the microwave on defrost. Just be careful not to melt it.
Color the Dough for Italian Flag Cookies
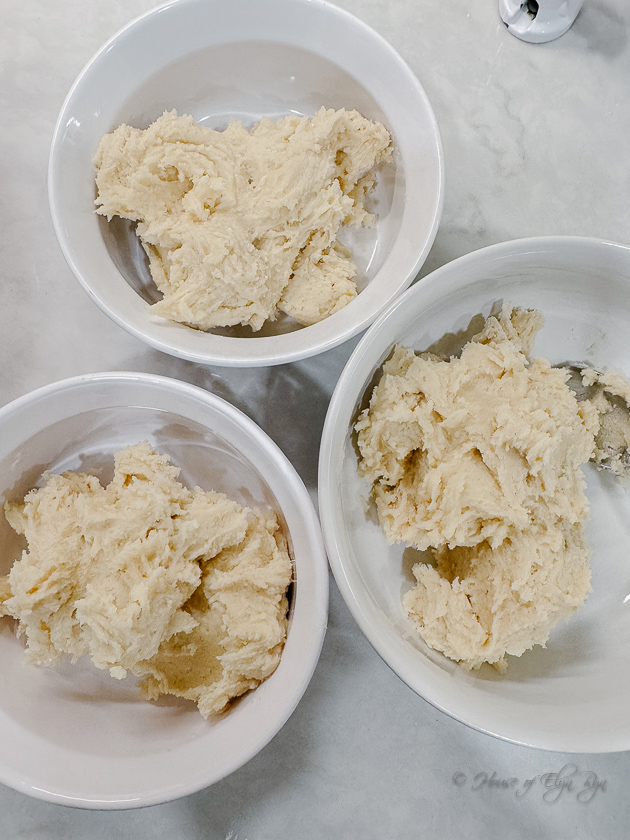
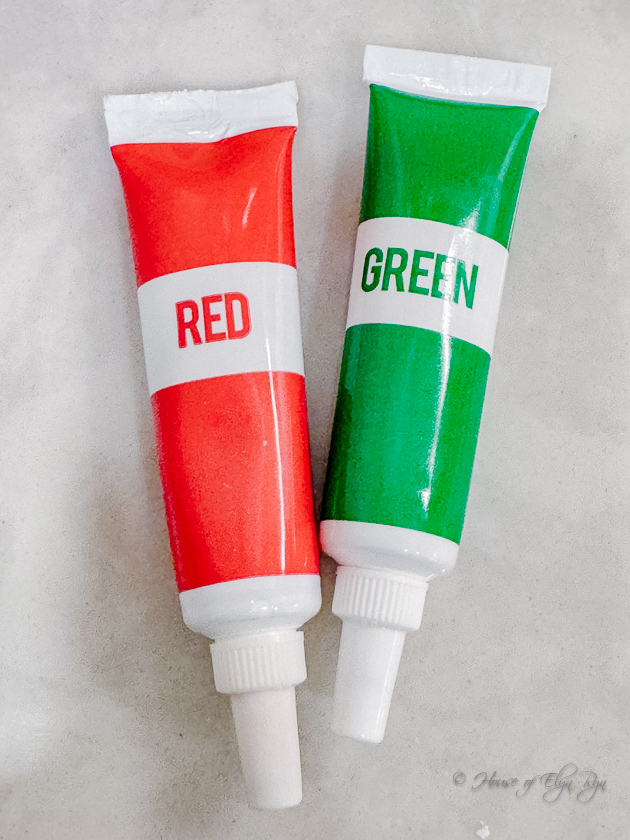
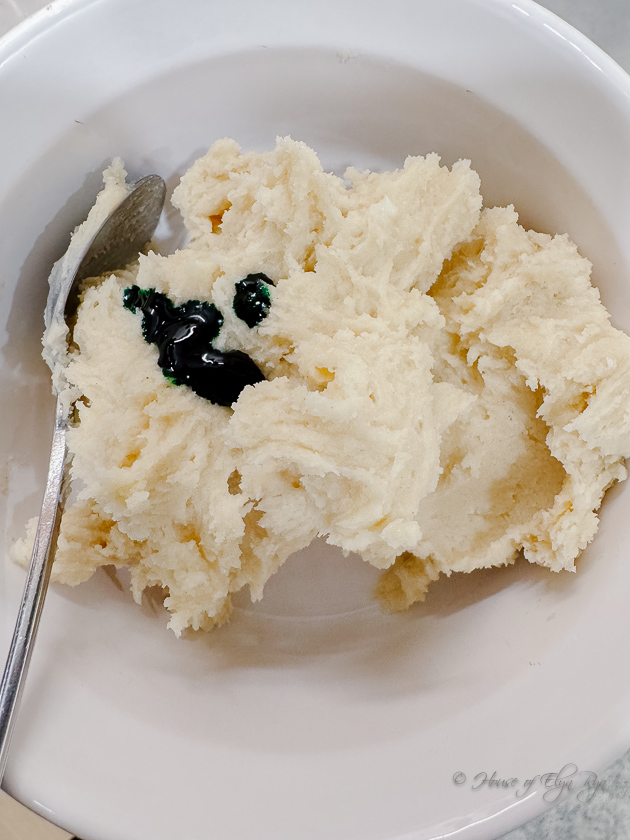
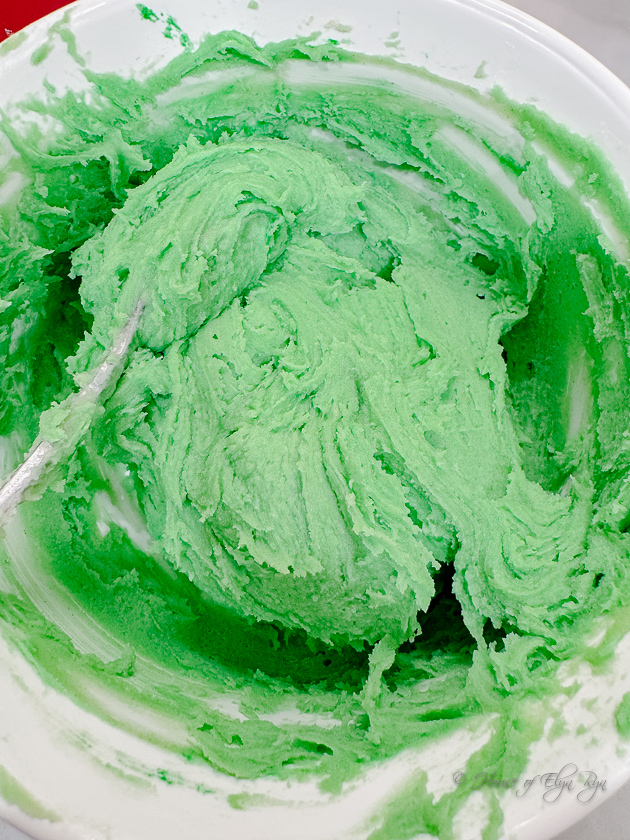
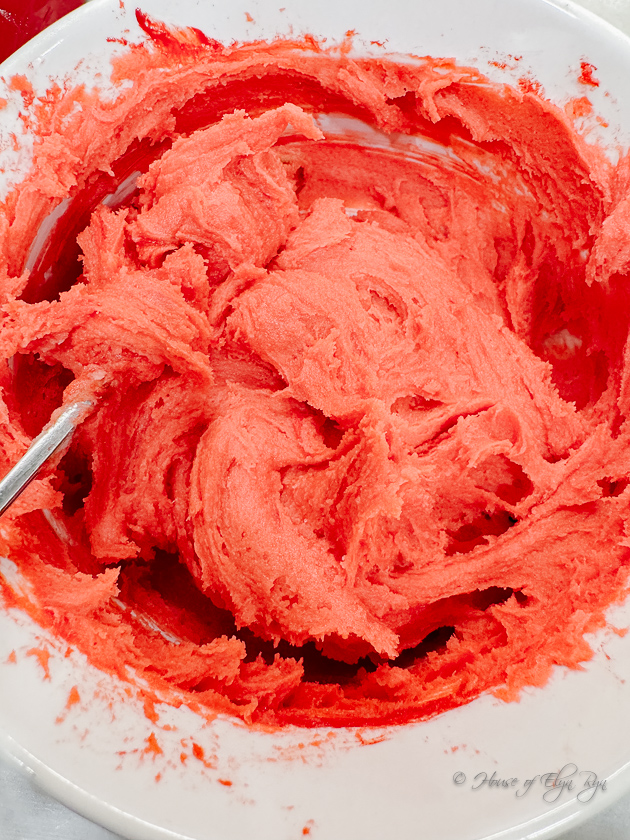
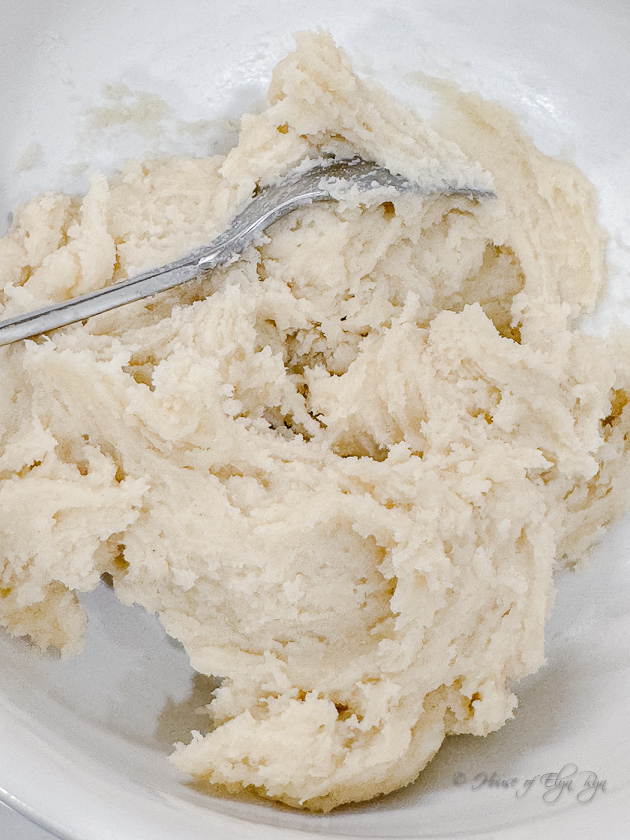
The Italian flag has three equal vertical stripes: green, white, and red, in that order. Once your base dough is ready, divide it evenly among three bowls. Then add green gel food coloring to one bowl and red gel coloring to another. It will take more coloring than you might think. Otherwise, you will have pastel-colored flags. The third bowl remains untouched, representing the white in the Italian flag. Make sure to mix thoroughly until the colors are evenly distributed.
Chill the Dough
After you’ve colored the dough, it’s time to chill it. Place a small plate over each bowl to make them stackable. Then store them in the refrigerator for at least 4 hours or overnight. Chilling firms up the dough, making it easier to handle when shaping into layers.
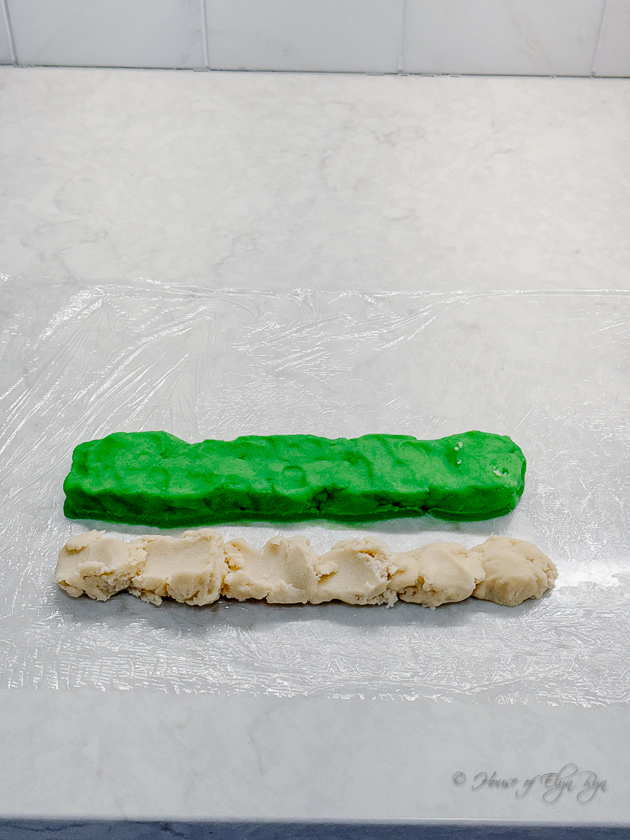
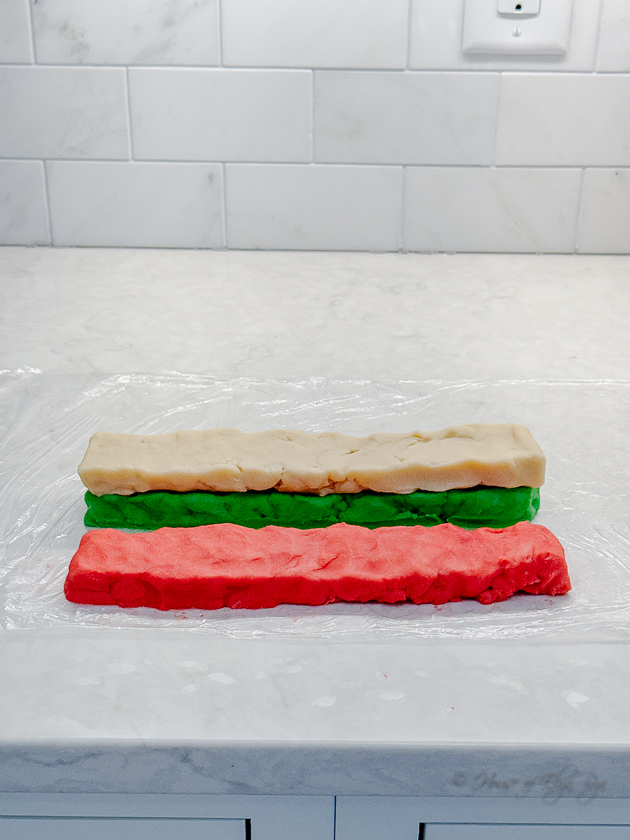
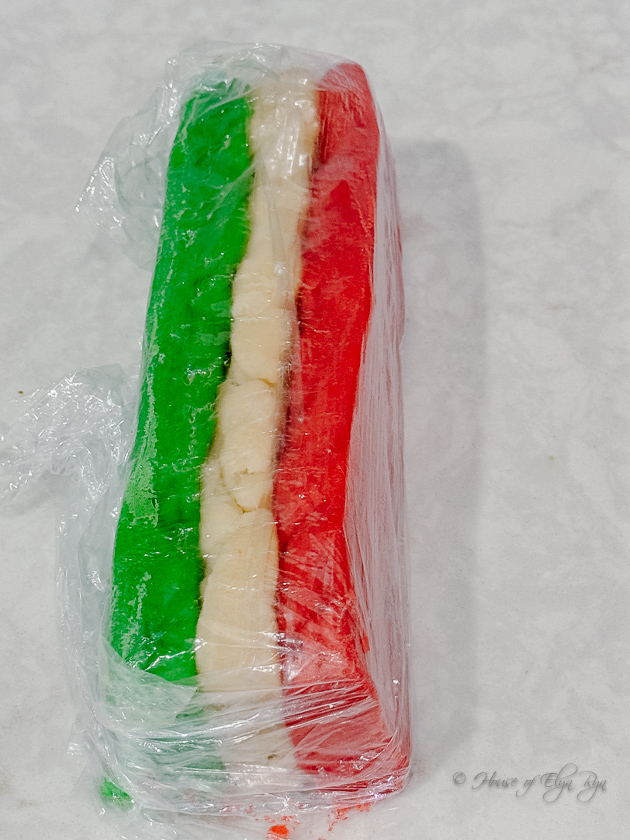
Shape the Dough into Flat Logs
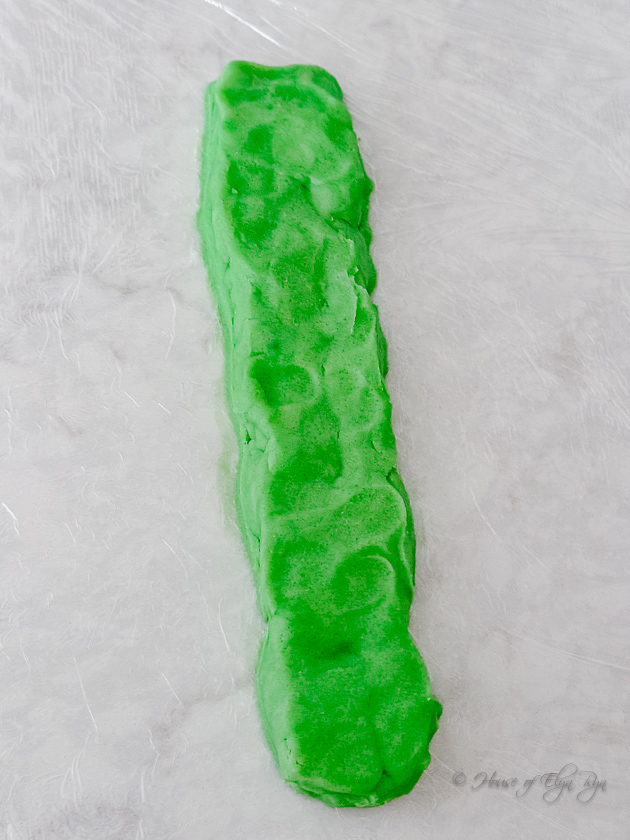
Once the dough is firm, lay out a sheet of plastic wrap on a flat surface. Start with the green dough and form a flat log, about two inches wide and 1/2 to 1 inch tall. Don’t worry if it is not perfectly smooth. Any indentations caused by your fingers will flatten out when baked.
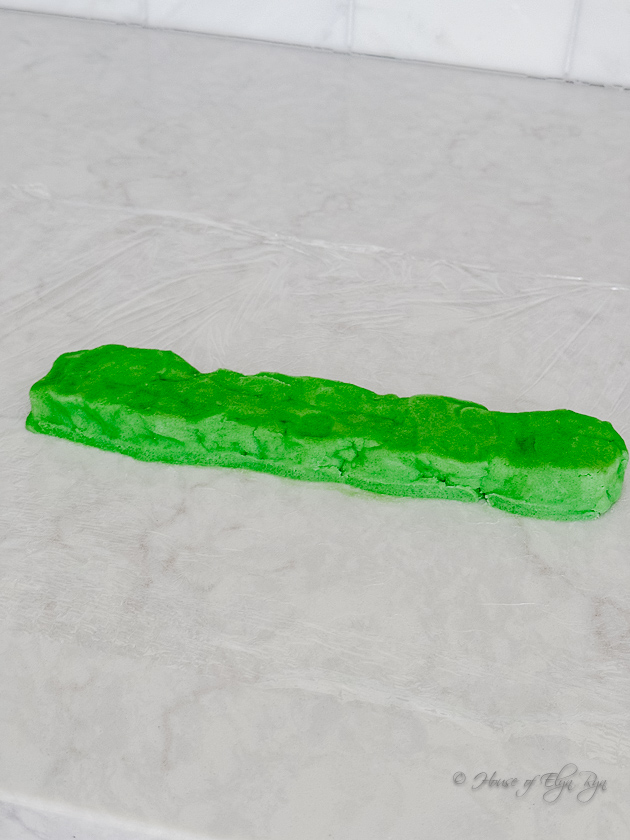
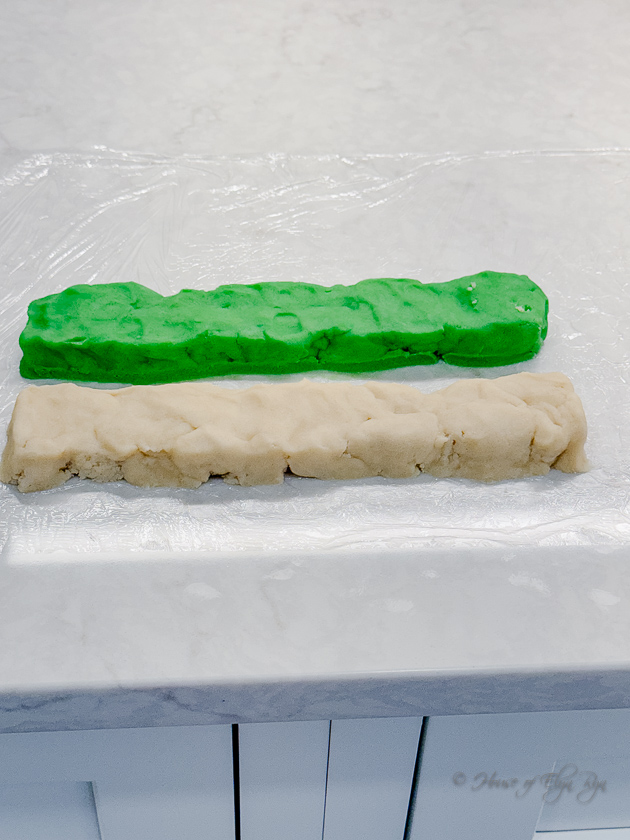
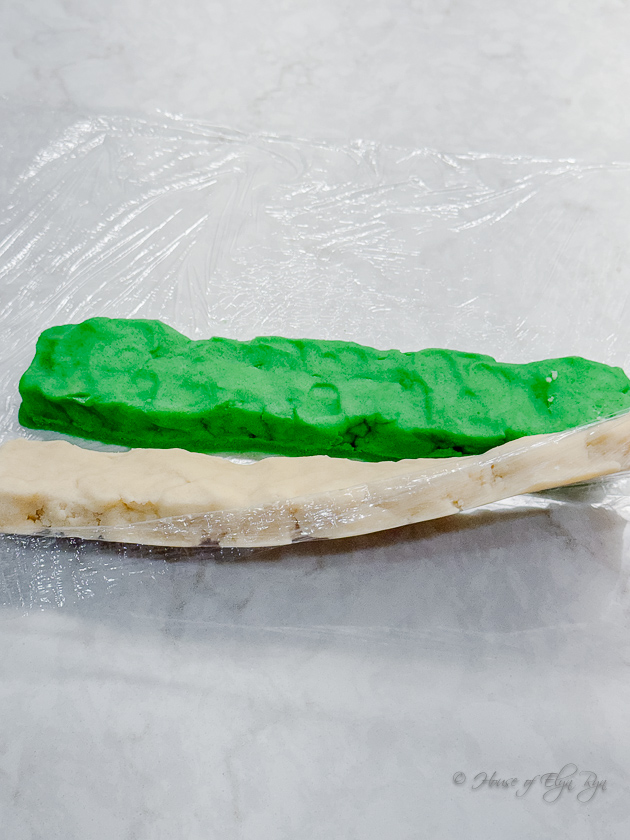
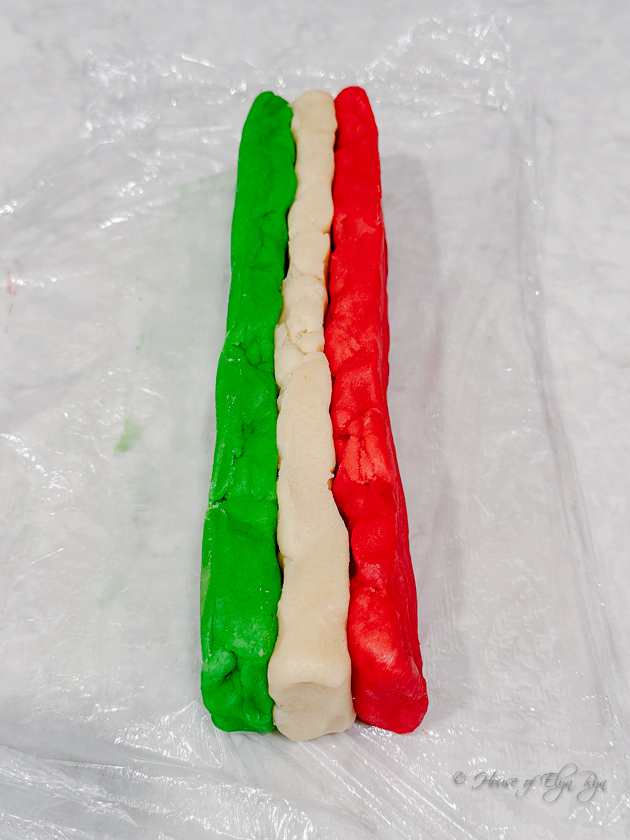
Use the green dough as a size guide and form a flat, white log next to it on the plastic wrap. Start by placing pieces of dough in a line. Then shape it with your hands. It will need to be a replica of the green log. Finally, lift the plastic wrap and flip the white log onto the green. Adjust it as needed.
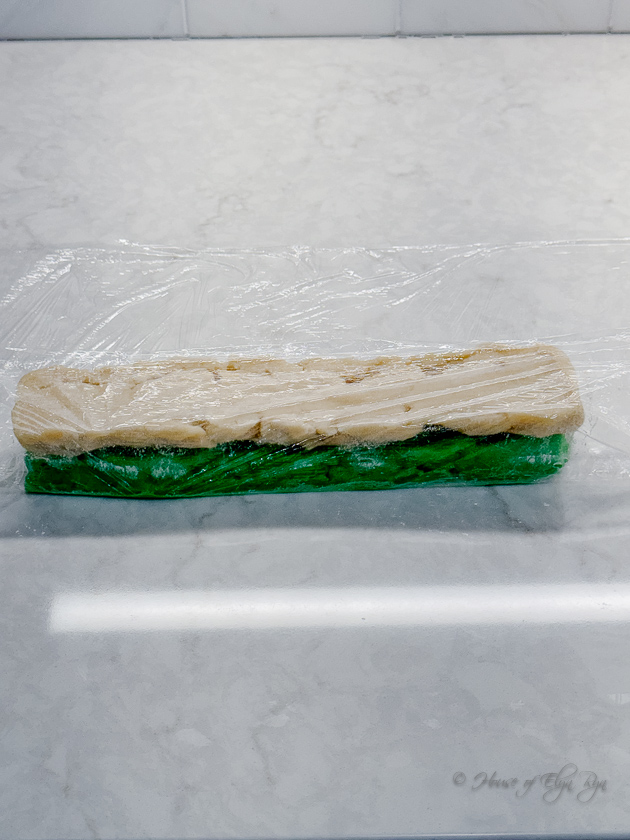
Finally, add the red log on top of the white. This layering technique creates the flag look that makes these cookies so special!

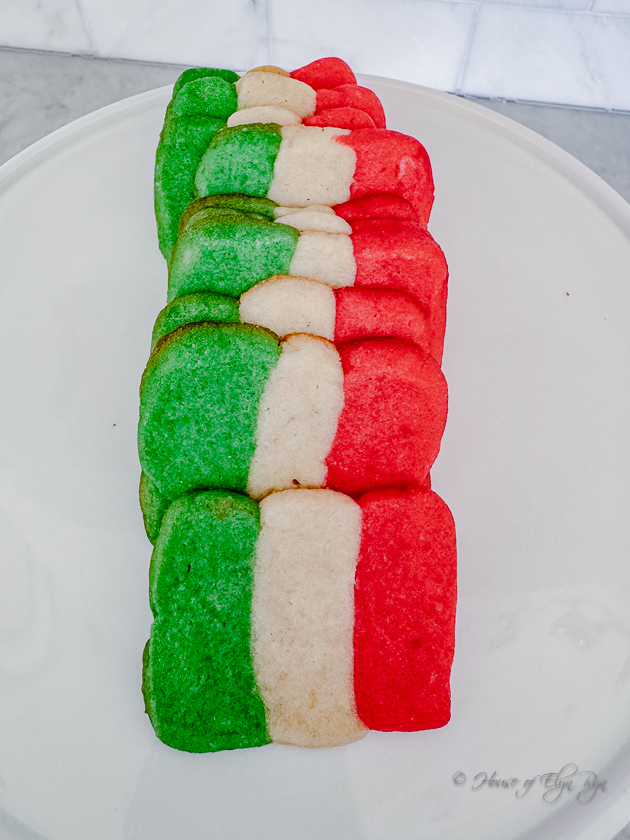
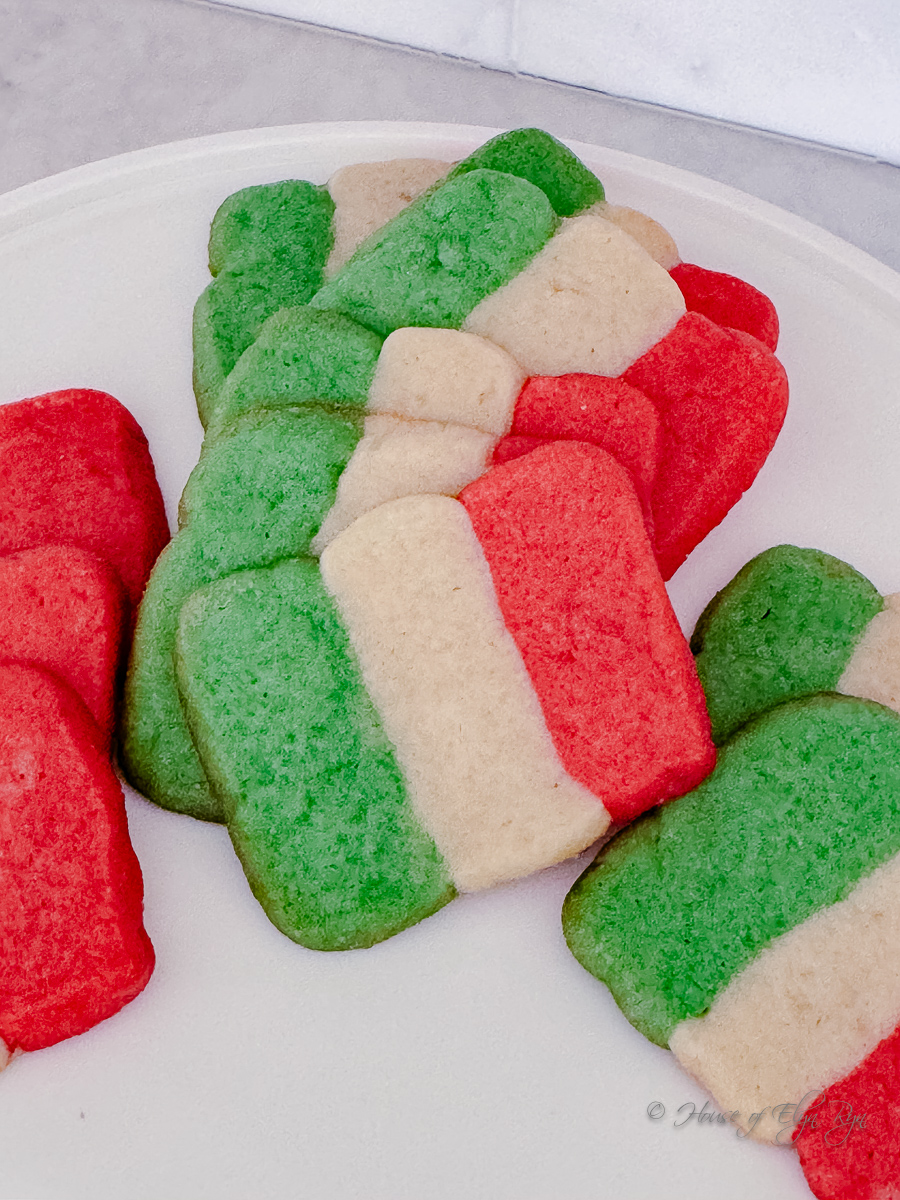
Slice and Bake Italian Flag Cookies
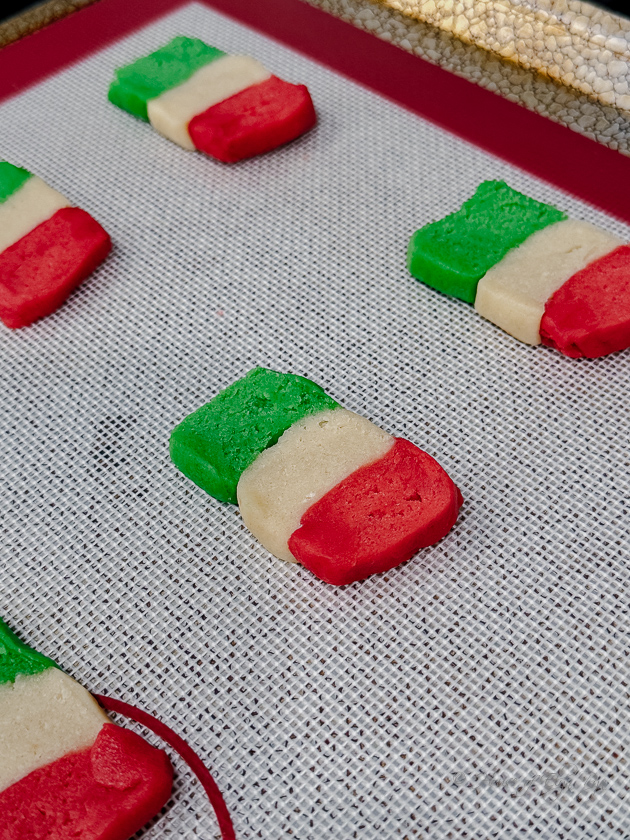
Preheat the oven and prepare a baking sheet lined with a silicone mat or parchment paper. Then, carefully slice the cookie log into ¼-inch pieces, starting from the end. Take care to ensure the stripes remain aligned. Place the cookies on the baking sheet, leaving ample space between them, and pop them into the oven.

Bake for 10-11 minutes, long enough to set the cookies, but not brown them. Let them cool on a cooling rack and then enjoy.
Storing Italian Flag Cookies
Store these cookies in an airtight container on the countertop. For longer-term storage, place them in the freezer.
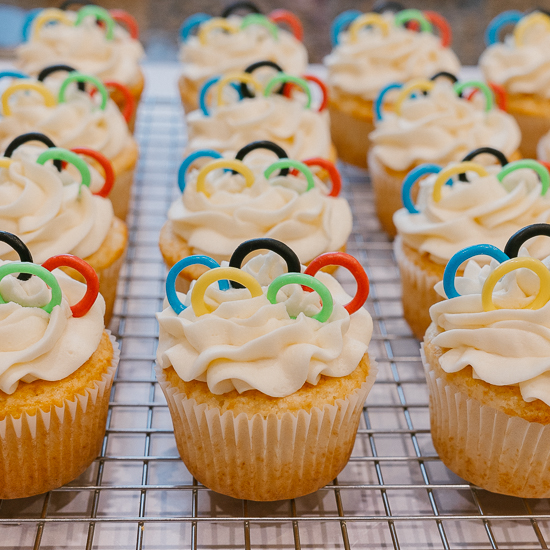
Other Olympics-Themed Recipes You Might Enjoy
Click on each name or photo to link to the recipe.
Italian Flag Cookies
Equipment
- mixer
- 3 cereal-sized bowls
- plastic wrap
- baking sheets
- silicone baking mat or parchment paper
- a large knife for slicing
Ingredients
- 1 cup unsalted butter, softened
- ¼ teaspoon salt
- ½ cup granulated sugar
- ½ cup powdered sugar
- 1 large egg, room temperature, and lightly beaten
- ½ teaspoon vanilla extract
- ½ teaspoon almond extract
- 2 ¼ cups all-purpose flour
- red gel food coloring
- green gel food coloring
Instructions
- Beat the butter in a mixing bowl. Add the salt, and then the sugars a little at a time, beating until creamy.
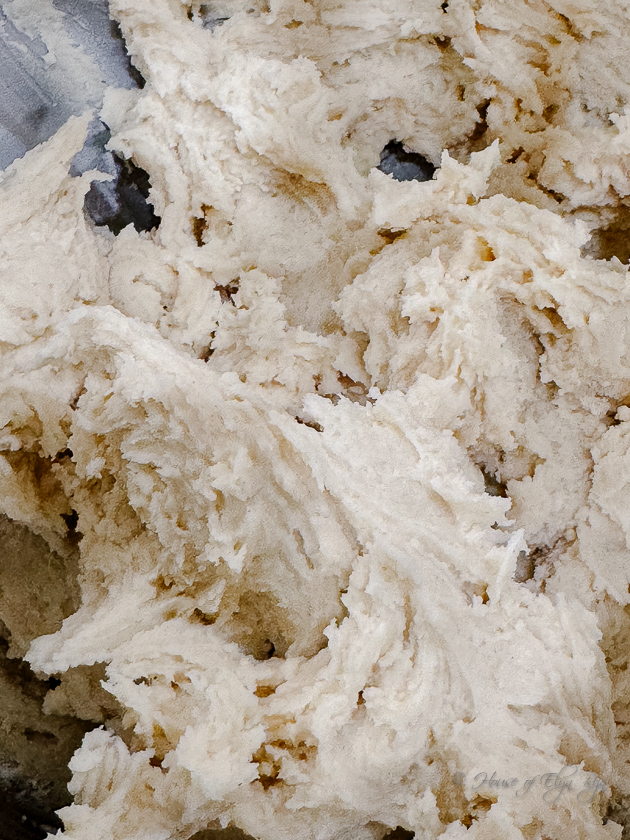
- Add the egg and extracts, then beat on low speed until mixed.
- Add the flour 1/2 cup at a time, mixing just until blended in. Do not overmix.
- Divide the dough evenly between 3 bowls.
- Add 25 drops of green food coloring to one of the bowls of cookie dough. Stir to distribute the color throughout the dough.
- To another bowl of dough, add 25 drops of red gel coloring and stir until thoroughly mixed.
- Cover the bowls with small plates. Stack the bowls on top of each other and refrigerate them for 4 hours to overnight to harden the dough.
- Place a sheet of plastic wrap on a flat surface. Remove the bowl of green dough from the refrigerator. Use a spoon to remove spoonfuls of dough from the bowl. Form a dough log in the middle of the plastic wrap, 2 inches wide and about 1 inch tall. It should be about 8-10 inches long. First, form a rough log. Then use your hands to press and sculpt it until it is flat on the top.
- Get the white dough from the refrigerator. Form another log of white dough in front of the green one, using the first log as a size guide. When they are close in shape and size, pull up on the plastic wrap to lift and flip the white log onto the green one. Adjust it as needed.
- Finally, create a red log on the plastic wrap that is the same size as the other two. Use the plastic wrap to help lift it and position it on top of the white dough log. Further hand shape as needed.
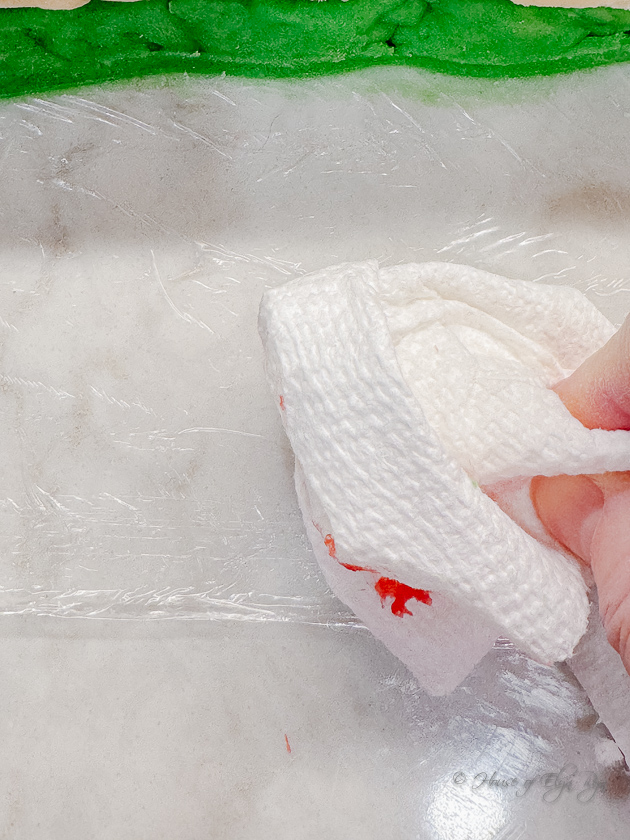
- Use a paper towel to wipe the plastic wrap clean from the red dough.
- Preheat the oven to 350°F. Place a silicone mat or parchment paper on a baking sheet.
- Cut the log into 1/4 inch pieces and place them 1 1/2 inches apart on the prepared baking sheet. Wipe the knife with a paper towel between cuts. Position the flags with the green stripe on the left side. Bake for 10-11 minutes, rotating the baking sheet after 5 minutes. Do not brown the cookies or they will lose their color.
- Rewrap the dough and refrigerate while a batch of cookies bakes. Repeat until all the cookies are baked.