
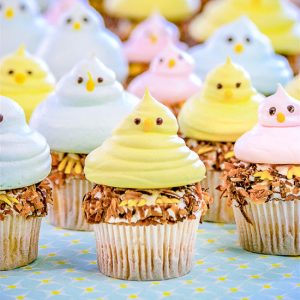
Meringue chicks, made from egg whites, are the perfect whimsical treat, bringing joy and creativity to your baking projects. Not only are they fun to make, but they also add a charming touch to cupcakes and cakes, making them a must-try for both kids and adults alike!
The Chick Story
After my daughter successfully incubated an egg in science class, we took home a little chick in a cardboard box. The joy of seeing it hatch was contagious, but before we knew it, the chick was taking over our lives! We quickly realized that our small box needed to be replaced with larger ones as the chick grew. Daily, we changed the newspaper lining, which never seemed to stay clean for long.
Eventually, our chick matured and no longer required the confines of its box. We decided to drive to our relatives’ country home, allowing the now-gangly adolescent chick to explore its new surroundings. The journey was lively, with my daughter alternating between tears of separation and attempts to capture the runaway chick. Ultimately, our decision to relocate the chick paid off because it was happiest in the fresh air alongside other chickens.

Making Meringue Chicks
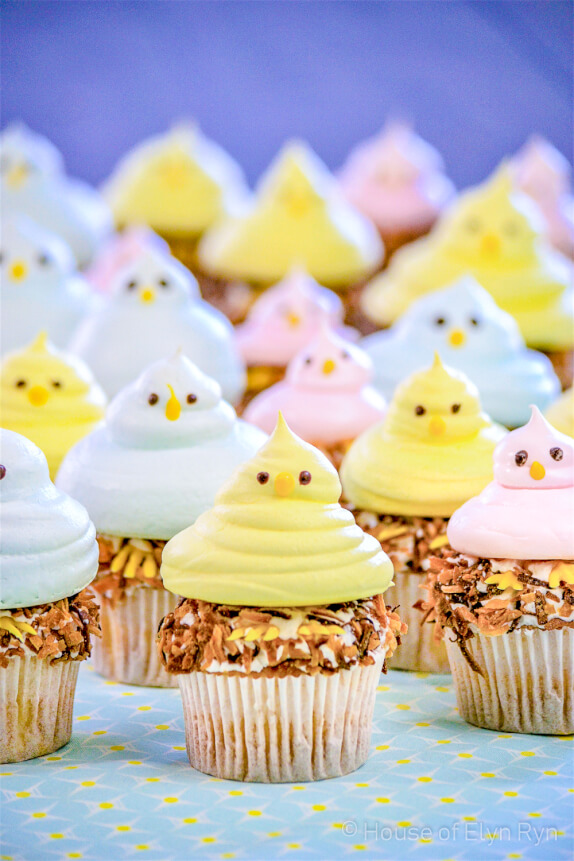
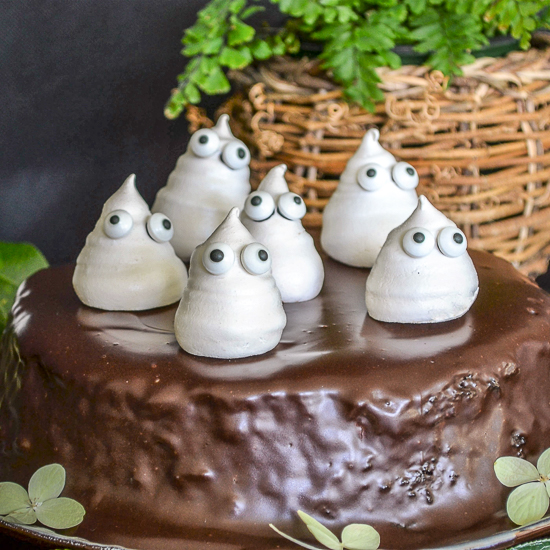
The little chick gave me an idea for creating meringue chicks to use as cupcake toppers. This fun project is a much less demanding alternative to caring for a real chick! The chicks can turn a plain cupcake or cake into a whimsical one. They are edible on their own and can be colored or left white.

Ingredients and Preparation for Meringue Chicks
This meringue chick recipe starts with egg whites. You make them in a similar way to merginue cookies at a low baking temperature. Start by gathering your ingredients: egg whites, cream of tartar, sugar, and various food colorings. Preheat your oven to 225°F and prepare a baking sheet lined with parchment paper, lightly greased to prevent sticking.

Whipping the Meringue
Use a mixer with a whisk attachment to whip the egg whites on medium speed until they become foamy. Next, add cream of tartar and continue beating. Gradually incorporate the sugar, one tablespoon at a time, until stiff peaks form.
At this stage, decide whether you want to color your meringue, as you can make white chicks. If you choose to color them, you can either add food coloring directly to the mixture or divide it into portions and color each separately. Whichever you choose, remember to have the meringue at stiff peaks before piping.
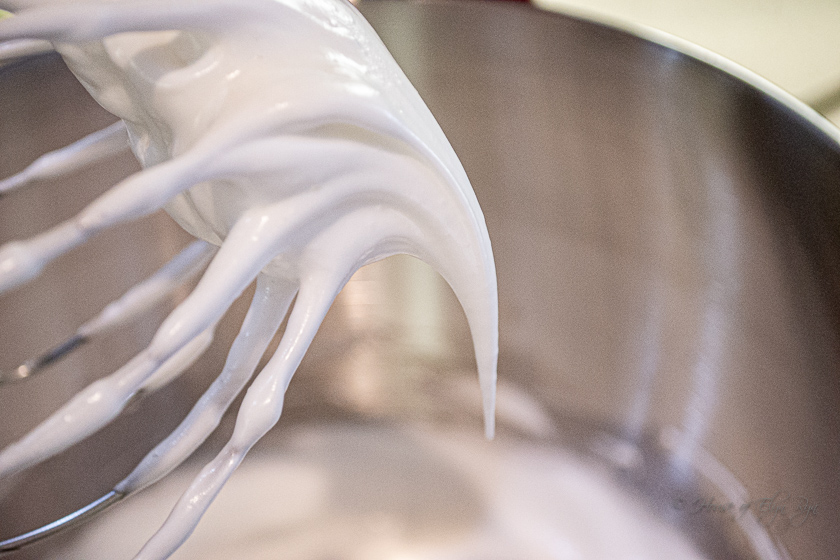
What are Stiff Peaks?
You create stiff peaks when you beat egg whites until they appear white and glossy. You can test whether they are ready by removing the whisk beater and leaving the meringue on it. Turn the beat to point the tip of it to the ceiling. The egg whites will stand and not droop when at the stiff peak stage. If, during the stiff peaks test, the egg whites droop, beat them a little longer and test again. However, be careful not to overbeat the egg whites, as they can collapse and become unusable.

Piping the Meringue Chicks
Transfer the colored meringue into extra-large piping bags fitted with a large round tip. Pipe the chick shapes directly onto the parchment paper, forming a base for each chick about two inches tall. For the base, squeeze gently to create a sturdy foundation. Once you achieve the desired height, pull the piping tip upward slightly to form the head. Don’t worry if you need to restart; just gather the meringue back and re-whip as needed.

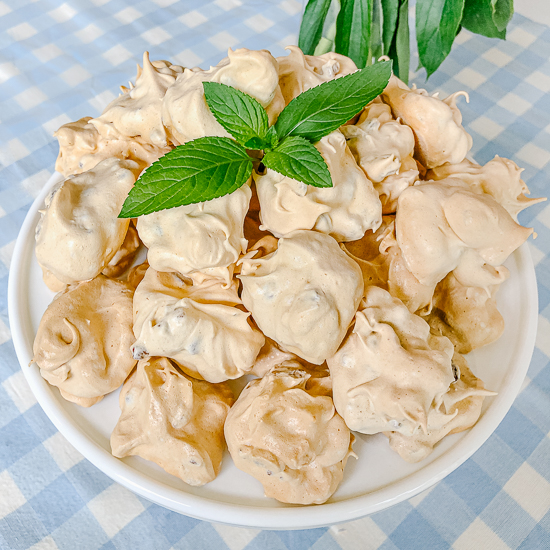
Baking and Decorating Meringue Chicks
Bake your meringue chicks for about an hour, ensuring they don’t brown. After baking, turn off the oven and let them cool inside until they harden.
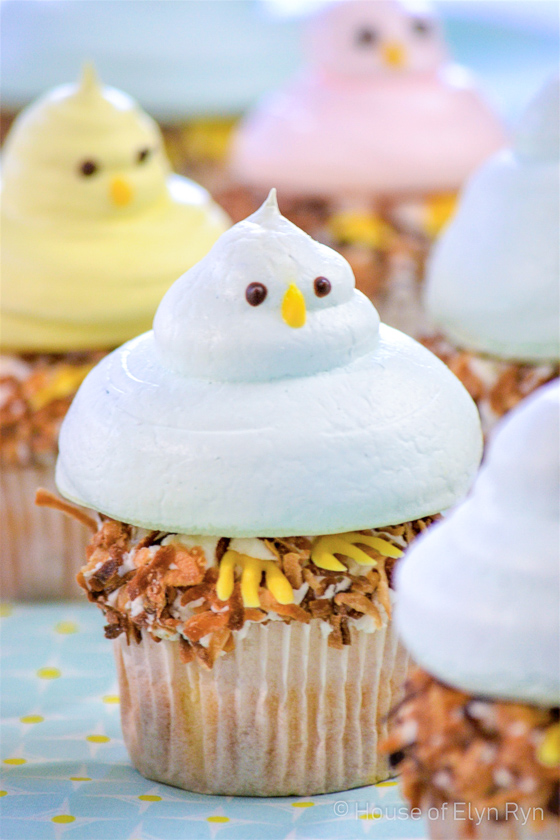
For the finishing touches, melt dark chocolate to create eyes. Use a small piping bag with a small round tip to add two dots for eyes. You can also melt white chocolate and tint it orange to form cute beaks for your chicks.
Once decorated, these adorable meringue chicks can serve as cupcake toppings or be enjoyed on their own! Plus, they keep well for days, making them a perfect sweet treat for any occasion.

Use Toasted Coconut to Add to the Charm
Make and frost cupcakes or use bought ones that are ready to decorate. Then, toast coconut in a 300°F oven. Spread the coconut into a thin layer on a large baking sheet. Bake it for 10 to 15 minutes, stirring every few minutes to ensure even browning. Then cool it completely so it doesn’t melt the frosting. Once cool, place it in a shallow bowl and roll the cupcake frosting in it, pressing it into the frosting to secure it.

Making Chick Feet
You can make optional feet for your little chicks. Melt white chocolate, tint it a dark yellow, and freehand pipe the feet. Use a small round piping tip, or cut a small hole in the end of a small resealable plastic bag to pipe the chocolate. For simplicity, make the feet about 1/2 inch long with three toes. They need not be perfect, and the shapes can vary. Place them in the refrigerator for 5 to 10 minutes to harden.
Later, when you are ready to attach them to the chicks, match similar-looking feet into pairs. Attach the chicks to the cupcakes with a bit of frosting or melted chocolate. Then insert the feet into the cupcake frosting until they are secure.

Other Meringue Recipes You Might Enjoy
Click on each name or photo to link to the recipe.

Meringue Chicks
Equipment
- extra-large piping bags
- small piping bags
- large round piping tip
- small round piping tip
- parchment paper
Ingredients
- 4 egg whites
- ½ teaspoon cream of tartar
- 1 cup sugar
- ⅛ cup dark chocolate chips (for eyes)
- ¼ cup white chocolate chips (for nose and feet)
- a few drops of orange food coloring (for the nose and feet)
- pink or red gel food coloring (optional) (for pink chicks)
- yellow gel food coloring (optional) (for yellow chicks)
- blue gel food coloring (optional) (for blue chicks)
- other gel colors of food coloring (use if you want other chick colors)
- 1/2-1 cup toasted, shredded sweetened coconut
- 12 frosted cupcakes
Instructions
- Preheat oven to 225°F. Place parchment paper on a baking sheet and spray with non-stick cooking spray.
- Using a mixer with a whisk attachment, beat the egg whites on medium speed until they become foamy.
- Add cream of tartar and continue beating.
- Add sugar one tablespoon at a time while beating.
- Increase the speed to medium-high and beat until stiff peaks form.
- At this point, you have two options. 1) Add a few drops of food coloring and beat it into the meringue to make only one color of chicks, or 2) Divide the meringue to make different colors. Divide into thirds if you want three different colored chicks, or divide in half for two colors.
- Add a few drops of food coloring, then beat until the color is evenly distributed throughout the first bowl of meringue.
- Place the colored meringue mixture into a piping bag with a large round tip, and pipe onto parchment paper to make a chicken shape about 2 inches tall.
- First, squeeze the piping bag to form a large base chick. Pull up on the bag slightly to set the base to the height you want. Stop pressing when the base is large enough, but do not pull the piping tip away from the base. Start squeezing again, gently, while raising the tip upwards to form the head. Remember, if you want a broader base, don't pull the tip up; keep it low in the meringue until the desired size is reached. To make a thinner, smaller head, squeeze with a light touch and pull the tip upwards.
- If you have to start over, scrape up the meringue and return it to the mixer bowl, beating it again until stiff.
- Repeat by coloring another bowl of meringue and making chicks in that color. Continue repeating until all chicks are made.
- Bake the chicks for about 1 hour. Do not let the tops brown, or the chicks will lose their color.
- Turn off the oven and cool the chicks until they harden. This can take a few hours.
- When cool, make the eyes for each chick. Melt chocolate chips on high in the microwave for 30 seconds. Stir. Heat again for 30 seconds, if needed. Put the chocolate in a piping bag fitted with a small round tip, then pipe two dots for eyes.
- Make the beaks for each chick by melting the white chocolate chips in the microwave using the same procedure you used for the chocolate chips. When melted, add orange food coloring and mix well. Place in a piping bag with a small round tip. Start a little below the center of the eyes and make a dot, then pull down to make a beak.
- Using the orange chocolate, pipe feet onto parchment paper. Make 3 joined toes (as shown in the photo under the "Making Chick Feet" heading. Anything similar to the ones shown in the picture will work. Make them about 1/2 inch long. Chill them in the refrigerator for 5 to 10 minutes and then insert them under the front of the chicks in the frosting.
- Assembly: Use a cupcake with a mound of frosting. Roll the frosting in the toasted coconut. Then, set the meringue chick into the frosting to attach it. If it isn't secure, add a little frosting or melted chocolate to the bottom of it to help it stay in place. Insert the feet under the front of the chick.