
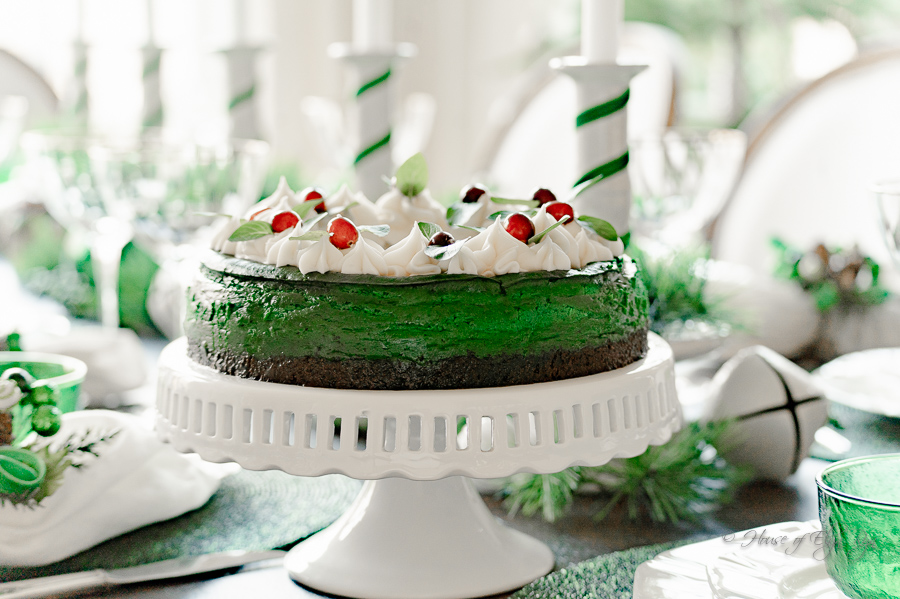
This beautiful green velvet cheesecake takes a cue from its sister, red velvet. It is made like a red velvet cheesecake, with a small amount of cocoa powder added to give it a light chocolate flavor, and green food coloring to achieve its deep green color. It is beautiful when served during the holidays or for occasions like Saint Patrick’s Day.
Sister to Red Velvet Cheesecake
Have you heard of green velvet cheesecake? This one came about when I couldn’t find a red velvet cheesecake at any bakery last Christmas. They were all sold out, which was fortunate because it forced me to think about red velvet differently. The green idea came about when I thought it would be pretty to match the cheesecake color to the green and white Christmas decorations I used. So out with the red velvet cheesecake and in with the green!

Make the Crust for Green Velvet Cheesecake
Use almond flour (or almond meal) and cocoa powder for the chocolate crust. Almond flour is easy to work with and is naturally gluten-free. It is made from blanched almonds that are finely ground into flour. In contrast, almond meal is ground from almonds with the skins left on and has a coarser consistency than flour. It is okay to use either product for this crust recipe. Tip: Keep almond flour in the refrigerator to extend its shelf life.
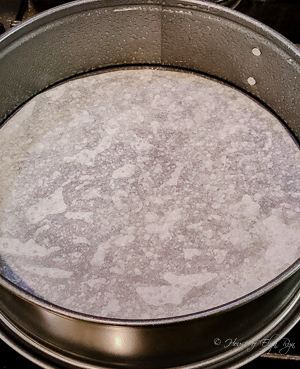

Prepare the Pan for Green Velvet Cheesecake
There is a trick for releasing the cheesecake from the bottom of the pan–just in case you want to place the cake on a decorative serving plate. Use parchment paper, even if you use a nonstick pan. This helps ensure the cheesecake doesn’t stick to the bottom of the pan.
Tips for a Green Velvet Cheesecake
When you make chocolate or colored cheesecake, have you ever found small white balls or specks in it? It is bits of cream cheese that did not get broken down during the beating process. This is caused by chilled cream cheese, which is harder to break down than room-temperature cream cheese. Here are tips to help you have a perfectly smooth cheesecake.
- Tip 1: Leave the cold ingredients out of the refrigerator until they are at room temperature.
- Tip 2: When beating the cheesecake, scrape the bottom and sides of the bowl, as cream cheese can stick to the bottom and not get fully incorporated into the batter.
- Tip 3: Consider beating everything (except the eggs) in a food processor. This will break down the cream cheese, making it smooth.
Use a Deep Pan
Use at least a 9-inch diameter by 3-inch deep springform pan (or a 10-inch pan) because this cake has a lot of batter.
Cut Perfect Green Velvet Cheesecake Slices
Cheesecake doesn’t cut well when it is warm or at room temperature, so follow these steps to cut perfect cheesecake slices.
- Chill the cheesecake in the springform pan until it is cold. (Or freeze the cooked cheesecake after it cools.)
- If starting with a frozen cheesecake, thaw for 15-20 minutes or until it is partially frozen. If starting with a cold but not frozen cake, cut it as soon as you remove it from the refrigerator.
- Heat a long, smooth-edged knife in hot water.
- Use the heated knife to make a cut to the center of the cake.
- Wipe the crumbs off and heat the knife again in hot water.
- Cut the other side of the cheesecake slice.
- Wipe it again and repeat the procedure until all cake slices are cut.
- Use this procedure to get clean, perfect cheesecake slices, as shown in the photo below.

Removing the Springform Bottom
You can serve the cheesecake on the flat bottom of the cake pan, which is the easiest way to present it. But for special occasions, you might want to place the cake directly onto a pedestal, cardboard, or plate. Two things make this possible: using parchment paper under the crust and freezing the cheesecake. (See instructions below.)

How to Remove the Pan Bottom
Follow these steps to remove the cheesecake bottom pan:
- Freeze the cheesecake in the springform pan.
- Remove the frozen cheesecake from the freezer.
- Place a cardboard circle (or a flat plate) on top of the frozen cheesecake while it is still in the pan.
- Invert the cheesecake. Use a hairdryer to heat the bottom and sides of the pan.
- Tap the pan against the edge of the counter while holding the cardboard in place.
- Remove the pan ring.
- Then, carefully remove the pan bottom from the cake.
- The parchment paper will stick to the cheesecake. Carefully peel it off.
- Place your chosen serving vessel on top of the inverted cake.
- Flip it over. The cake is now ready for serving or adding decorations to the top.
I hope you enjoy this recipe for Green Velvet Cheesecake!

Other Cheesecake Recipes You Might Enjoy
Click on each name to link to the recipe.

Green Velvet Cheesecake
Equipment
- (1) 9-inch wide x 3-inch deep springform pan
- (1) 1M large star tip
- (1) piping bag
Ingredients
Crust
- 1 ½ cups almond flour
- ¼ cup granulated sugar
- ¼ cup dark cocoa powder
- ¼ cup butter, melted
Cheesecake
- (3) 8-ounce packages cream cheese, softened
- 1 ½ cups granulated sugar
- 4 large eggs, room temperature
- 3 tablespoons cocoa powder
- 1 cup sour cream, room temperature
- ½ cup buttermilk, room temperature
- 2 teaspoons vanilla extract
- 1 teaspoon distilled white vinegar
- (2) 1-ounce bottles green food coloring (or enough green gel coloring to make a deep green)
Cream Cheese Buttercream Topping (optional)
- 4-ounce package cream cheese, softened
- ¼ cup butter, softened
- 2 cups powdered sugar
- 1 teaspoon vanilla extract
- mint leaves for garnish (optional)
- fresh cranberries for garnish (optional)
Supplies
Instructions
Crust
- Preheat oven to 400 degrees F.
- Grease the bottom and inside ring of the springform pan. Add a round-cut parchment paper to the bottom of the pan and grease the top.
- Mix the sugar, almond flour, and cocoa powder. Add the butter and stir until mixed well. Press the crust mixture into the bottom of the prepared pan. Use a flat-bottomed glass or cup to tamp down and flatten the crust.
- Bake for 6 minutes on a baking sheet with sides (in case the springform pan leaks melted butter). Cool.
Cheesecake
- Reset the oven to 325 degrees F. Fill a large flat pan with hot water and place it on the bottom oven rack. (See the note for Hot Water Pan below.)
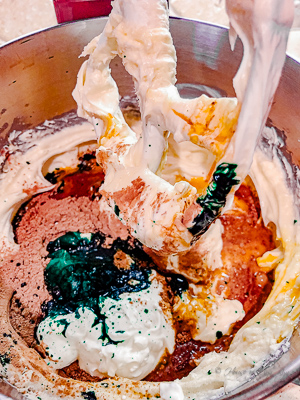
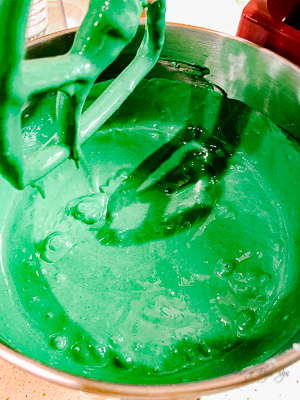
- In a large mixing bowl, beat the cream cheese and sugar until smooth. Add the eggs, cocoa, sour cream, buttermilk, vanilla, vinegar, and green food coloring. Mix until just combined. Do not overbeat. Pour the batter into the prepared pan. Place the pan on a baking sheet and place it in the oven.
- Bake for 10 minutes. Then reduce the heat to 300 degrees F and bake for 1 hour and 15 minutes. Turn the oven off and let the cheesecake stay in it for 30 minutes. Then, remove the cheesecake and cool the pan on a wire rack. Chill overnight.
Cream Cheese Buttercream Topping (optional)
- Beat the cream cheese, butter, and vanilla until smooth. Add the sugar, a little at a time, beating well after each addition. Then, place the buttercream into the piping bag and add the star tip. Pipe stars around the outer edge of the chilled cheesecake. Garnish with mint leaves and cranberries, if desired. If you prefer a plain cheesecake, you can omit this topping.
Notes
Room Temperature Ingredients
Cold ingredients can affect the baking time of the cheesecake. Have all cold ingredients at room temperature. This can take 1 hour or more.Baking a Cheesecake with Water
Ovens are dry and can cause cheesecakes to crack on top as they cook. However, You can add moisture to the oven with a pan of water. Here are two methods for baking with water.Method 1 — Hot Water Pan on the Bottom Rack
Place a large, flat warm-water-filled pan on the bottom oven rack and cook the cheesecake on the rack above it. This method is simple but doesn’t always guarantee a crack-free top. Be sure the water is warm or hot when you place it in the pan because cold water can reduce the oven temperature.Method 2 — Water Bath (a.k.a. Bain Marie)
Another method is to cook a cheesecake in a water bath. It is the ultimate way to prevent a cheesecake from drying and cracking during baking. It also promotes even cooking. Here are the steps for this method:- Use a large pan with sides. The springform pan should fit into the pan easily and accommodate water. (A broiler pan will work.)
- Wrap the outside bottom and sides of the springform pan in aluminum foil to keep the water out of the cheesecake. You can wrap the pan before or after you add the batter. Make sure there are no holes or tears that water can seep into.
- Optional: As an extra precaution against water leakage, place a plastic slow-cooker bag around the aluminum-foil-wrapped pan. Only use a slow-cooker bag because other plastic bags will melt in the oven.
- Place the wrapped springform pan into the water bath pan.
- Place the water bath pan into the oven.
- Fill the bath pan with warm or hot water using a water kettle (or other pouring device that you can control splashes). Water should come at least halfway up the springform pan. Be careful to ensure that no water splashes into the cheesecake batter.
- Cook the cheesecake according to the recipe instructions.
How to Remove the Springform Pan Bottom
You can remove the springform ring from the cheesecake and serve it on the pan bottom. However, if you prefer to remove the pan bottom and serve the cake on another cake stand, follow these steps:- Freeze the cheesecake overnight in the pan.
- Remove the cheesecake from the freezer and let it sit out for 10-15 minutes.
- Place a cardboard circle (or flat plate) on the top of the springform pan (larger than the pan).
- Invert the cheesecake. Use a hairdryer to heat the bottom and sides of the pan.
- Tap the pan on the counter edge while holding the cardboard in place. This will dislodge the cheesecake. If not, heat it again and then tap it again.
- Remove the pan ring.
- Then carefully remove the pan bottom from the cake.
- The parchment paper (if used to line the pan bottom) might stick to the cheesecake. If so, carefully peel it off.
- Then place your chosen serving plate (on the crust) on top of the inverted cake.
- Flip the cheesecake over. The cake is now ready for serving or adding decorations to the top.